WiFi and SSH
Before we begin I must warn you that I found out the hard way that you will need an 8GB microSD card for any raspberryPi project.
Start by installing the RaspberryPi OS on the microSD card and do the initial installation on the RaspberryPi ZeroW. When the installation is completed log in as the user "pi" and the default password "raspberry".
Run the terminal GUI application to configure the raspberryPi.
sudo raspi-configStart by activating WiFi:
Open: 1 System Options -> S1 Wireless LAN
Select the correct country code, and enter the SSID (wireless network name), and the passphrase. If you entered the correct credentials you will get no error and be returned to the main menu. Now you can activate SSH:
Open: 3 Interface Options -> P2 SSH
Reboot and login as the user pi again. Now you only need to find the IP address of the RaspberryPi, so you can access is via SSH, and disconnect the monitor and keyboard.
ip a
1: lo: <LOOPBACK,UP,LOWER_UP> mtu 65536 qdisc noqueue state UNKNOWN group default qlen 1000
    link/loopback 00:00:00:00:00:00 brd 00:00:00:00:00:00
    inet 127.0.0.1/8 scope host lo
       valid_lft forever preferred_lft forever
    inet6 ::1/128 scope host
       valid_lft forever preferred_lft forever
2: wlan0: <BROADCAST,MULTICAST,UP,LOWER_UP> mtu 1500 qdisc pfifo_fast state UP group default qlen 1000
    link/ether b8:27:eb:59:78:ab brd ff:ff:ff:ff:ff:ff
    inet 10.22.22.127/24 brd 10.22.22.255 scope global dynamic noprefixroute wlan0
       valid_lft 85656sec preferred_lft 74856sec
    inet6 fe80::dd05:d464:fc67:bb5c/64 scope link
       valid_lft forever preferred_lft forever
By reading the output you can find that the IP address that was automatically given by my DHCP server was 10.22.22.127.
I now disconnect my monitor and keyboard from the raspberry pi, and SSH into it
ssh pi@10.22.22.127From the SSH session, everything is a lot more practical. Especially if you like me only have one keyboard that has to be swapped between the "normal" computer and the RaspberryPi.
Before we continue with the rest of the project we must update the OS to the latest version, and install the almighty vim text editor.
sudo apt update && sudo apt upgrade -y
sudo apt install vim
After the update, you probably have to reboot the system to make use of the latest kernel.
sudo reboot nowUsers
The pi user is boring and is a known user that can be used for an attack on the RaspberryPi. To make the print server more personalized I added a user for myself and added it to the sudo group. After it was created I removed the pi user since I had no use for it. This user will be used to manage the print server from now on.
sudo useradd -m -s /bin/bash stanley # create user
sudo usermod -aG sudo stanley # add user to sudo group
sudo passwd stanley # set login password
When you have created a good password on your new user you can switch to it and remove the pi user.
exit # close the ssh session
ssh stanley@10.22.22.127 # ssh into the RapsberryPi with the new user
sudo userdel -r pi # delete pi user and its home directory
Static IP
Every server should have one...
The RaspberryPi is connected to the network, but since it gets its IP address from my DHCP server it will get a different IP address for each reboot. To make both the management of the print server, and the access to it as predictable as possible a static IP has to be set.
Add these lines to the bottom of your DHCP config file.
sudo vim /etc/dhcpcd.confinterface wlan0
static ip_address=10.22.22.53/24 # Set IP address and prefix
static routers=10.22.22.1 # Your router
static domain_name_servers=8.8.8.8 ## Your DNS serverRestart the RaspberryPi to apply the changes to the IP address.
sudo init 6You should now be able to SSH in with your user to that IP address.
ssh stanley@10.22.22.53CUPS
Common Unix Print Service
CUPS is a fantastic print server management tool that makes it possible to manage printers via a simple web interface. Start by installing it.
sudo apt install cupsTo make my user able to manage the print server via CUPS it has to be added to the user group lpadmin:
sudo usermod -aG lpadmin stanleyBy default, CUPS is configured to only allow access to the web interface from localhost. This is pretty unpractical for a network printer. Because of this, we must make it accessible over the network by editing the CUPS config file:
sudo vim /etc/cups/cupsd.conf...
# Only listen for connections from the local machine.
Port 631
Listen /run/cups/cups.sock
# Show shared printers on the local network.
Browsing On
BrowseLocalProtocols dnssd
# Default authentication type, when authentication is required...
DefaultAuthType Basic
# Web interface setting...
WebInterface Yes
# Restrict access to the server...
<Location />
Order allow,deny
Allow @LOCAL
</Location>
# Restrict access to the admin pages...
<Location /admin>
AuthType Default
Require valid-user
Order allow,deny
Allow @LOCAL
</Location>
...To apply the changes, the print server has to be restarted.
sudo systemctl restart cupsTo access and manage cups you must use a web browser, and navigate to https://10.22.22.53:631/admin.
Authenticate with the username and password for the user you added to the lpadmin group. For me, it was the user stanley.
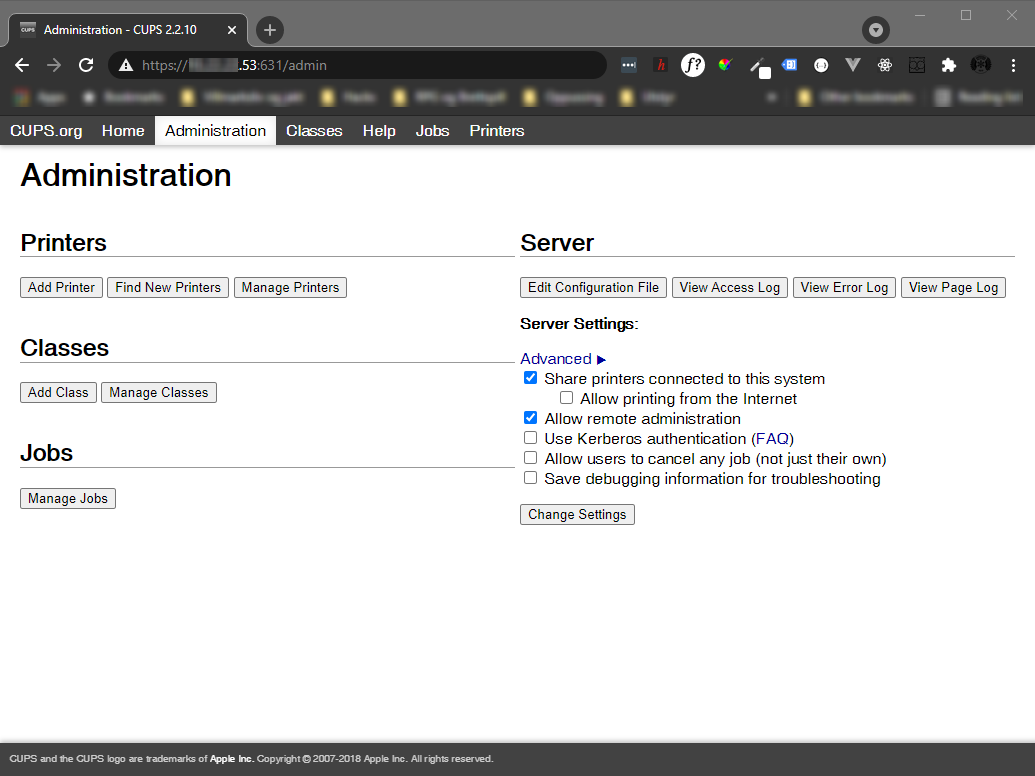
When you have successfully authenticated, you will be presented with the CUPS admin panel. Now you can connect the printer to the RaspberryPi, and add it to CUPS.
Please note that many printers are included in the Linux kernel, but not all. For my HP LaserJet printer, I had to install the "hplip" library to get it working with my Raspberry Pi.
Remember to check the box to share the printer.
When you have added the printer, and successfully printed a test page from CUPS, you have successfully set up your Raspberry Pi as a print server 🎉