The PlayStation 2 is an amazing console that I think still has a great library of fun games. When my DVD drive stopped working, I had to find alternative ways to play my games. Thankfully, FreeHDBoot is a great option that lets you play games directly from your HDD without a FreeMCBoot Memory Card or modchip.
Setting up FreeHDBoot has become really simple, but it can still be confusing. The biggest problem is the number of outdated guides online and on YouTube. Many guides also skip explaining the steps needed to fully understand what's going on, create your own configurations, and make the softmod your own. As a hacker, I don't think that's educational or fun. This guide intends to make up for that.
Overview
In order to complete this process, you need a few hardware components:
- A fat PlayStation 2
- An HDD/SSD adapter with a SATA connector.
- An HDD or SSD with less than 2 TB of storage
- A USB thumb drive - FAT32 formatted
- An HDD/SSD dock to connect the HDD/SSD to your computer
- A video upscaler that lets you connect the PlayStation 2 to a modern monitor (optional)
- A computer running Windows
The fat PS2 is great for this mod since you can get an all-in-one package for your PS2 gaming experience without the need for any extra peripherals. Once this softmod is installed, you only need to remove the HDD/SSD in order to add new game backups, homebrew, or themes. When the HDD/SSD is not installed, the PS2 will behave as a normal PS2.
You can use any HDD/SSD adapter as long as it has a SATA connector. I have used both the official PS2 network adaptor with a SATA mod, and a modern HDD/SATA adaptor from Game Star. Both work great. Note that the Game Star adaptor doesn't have an Ethernet port.
Both an HDD and an SSD work, but this softmod will not work with a disk larger than 2 TB. In my experience, that's plenty since most PS2 games came on a single-layer DVD, making them around 4 GB. Many of the games can be on CDs. In my case, I was able to fit my entire backup library while barely using my HDD. An alternative method for running games from an HDD/SSD is available: format the drive to ExFAT and use drives up to 32 TB. This makes it simpler to transfer games from your computer to the drive, but you must boot the PS2 from a FreeMCBoot Memory Card since the PS2 can't natively read ExFAT drives.
To complete the setup, you will need to use a USB thumb drive. This will store files you can't add during the HDD/SSD formatting and initial setup phase.
An HDD/SSD dock is not strictly needed if you have a desktop computer with a free SATA port on your motherboard, but it will make life easier regardless. As a computer enthusiast, I can't imagine not having one. So get one if you don't already have one. It will come in handy many times later in life.
A video upscaler probably isn't needed either, but if you don't want to run between your television and computer during installation, it's pretty handy.
Since all the tools needed to perform this softmod run on Windows, you will need a computer or virtual machine running Windows with access to the PS2 HDD/SSD to set it up and transfer game backups, homebrew, and themes.
The installation is performed in a few simple phases.
- Prepare HDD/SSD
- Install FreeHDBoot on the HDD/SSD
- Prepare OPL (Open PS2 Launcher)
- Transfer game backups to the HDD/SSD
- Get and install cover art used by OPL
- Configure OPL
- Play game backups
Prepare HDD/SSD and USB
When the PS2 powers on, it reads the boot sector of the connected HDD/SSD. If it's set up correctly, it will boot into that instead of the default menu. This feature lets the PS2 boot into wLaunchELF, which allows you to run the FreeMCBoot/FreeHDBoot installer from your USB Thumb drive. The installer can be used to set up a FreeMCBoot memory card, or install FreeHDBoot on your HDD/SSD.
To prepare your HDD/SSD, use a tool called "HDD Raw Copy Tool" in combination with a disk image that boots into wLaunchELF
- Download the newest version of HDD Raw Copy Tool. The portable version can be used without any installation.
- Download the wLaunchELF disk image.
Insert the HDD/SSD into your dock, and connect it to your computer, then launch the "HDD Raw Copy Tool". Accept the warning that the software isn't signed, and run it with administrative privileges. It needs admin privileges to make changes to the disk.
Select the disk image as the __mbr.raw image file source, and the HDD/SSD as the target. Use a 0-byte offset, and start the write.
Warning!! Double-check that you have selected the correct HDD/SSD.
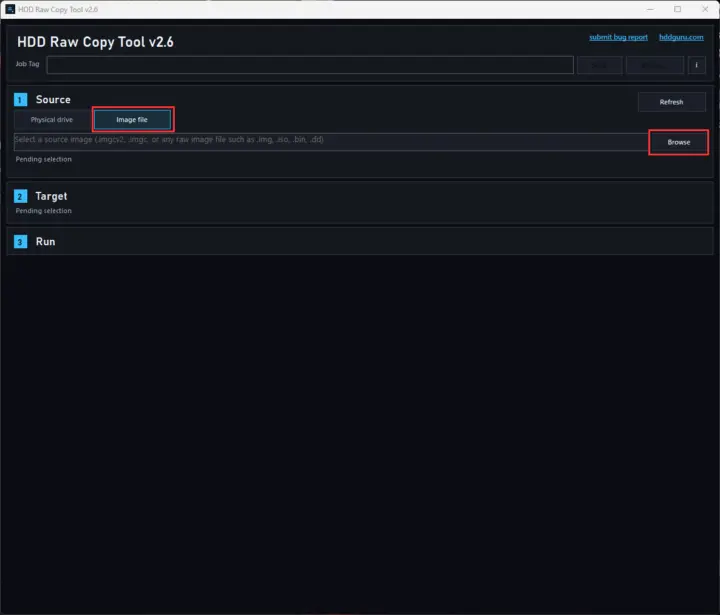
Select the image file to be written to the HDD/SSD
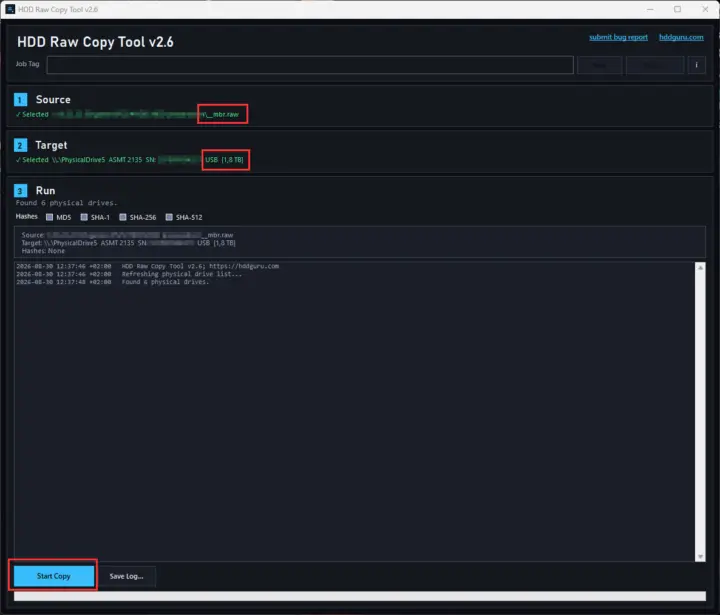
Both the source file and destination drive has been selected
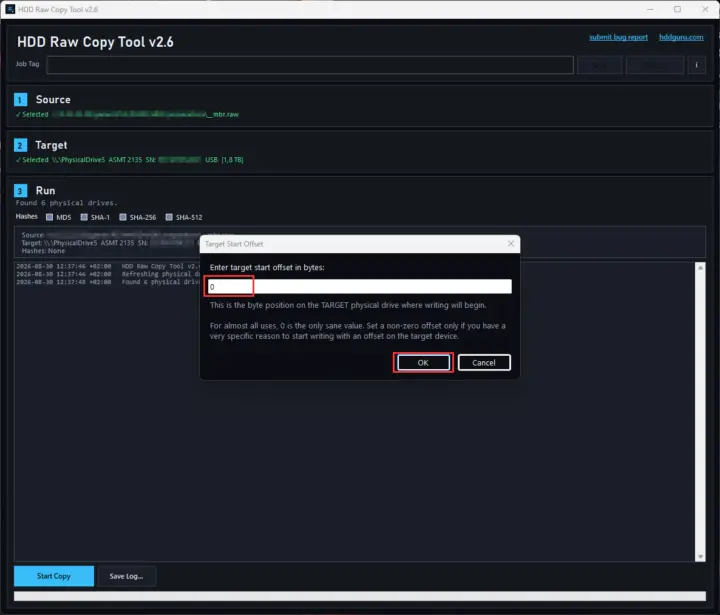
Keep the target offset at 0
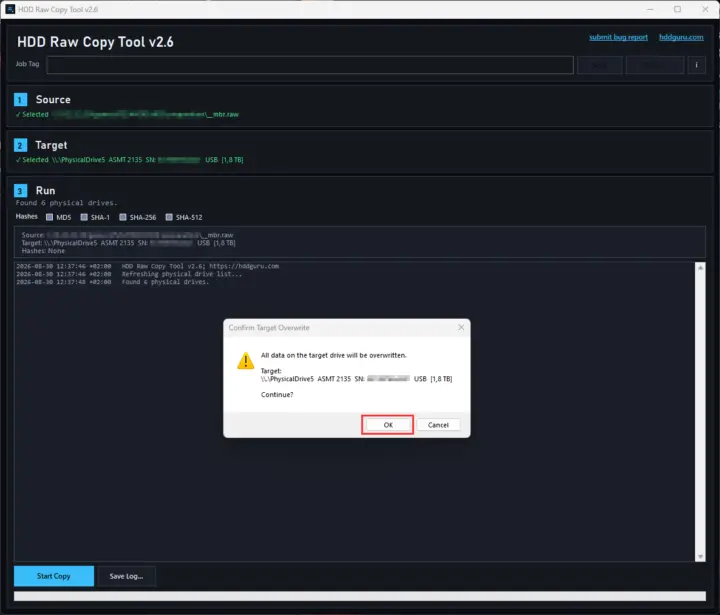
Confirm to start the operation
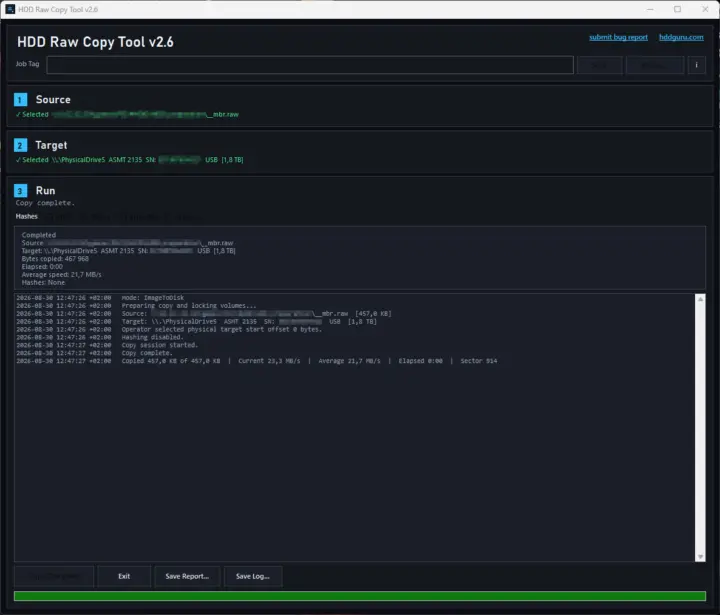
Write operation completed
To set up your USB drive you need three programs.
FreeMCBoot/FreeHDBoot installer: Download the latest version of the installer from GitHub. Currently, it's FMCB-1966. Extract the 7z archive to your USB drive, and rename the directory "FMCBinst-1966-[2025-01-01]" to "FMCBinst".
wLaunchELF: Download the "BOOT.ELF" executable from GitHub, and place the file in the root of the USB drive.
OPL: Download the latest OPL beta version from GitHub. The beta is stable and has more features than the latest proper release. The current beta is called OPNPS2LD-v1.2.0-Beta-2245-3e3f34e. Extract the 7z archive, open it, and rename the executable from "OPNPS2LD-v1.2.0-Beta-2245-3e3f34e.ELF" to "OPNPS2LD.ELF" and place it in the root of the USB drive.
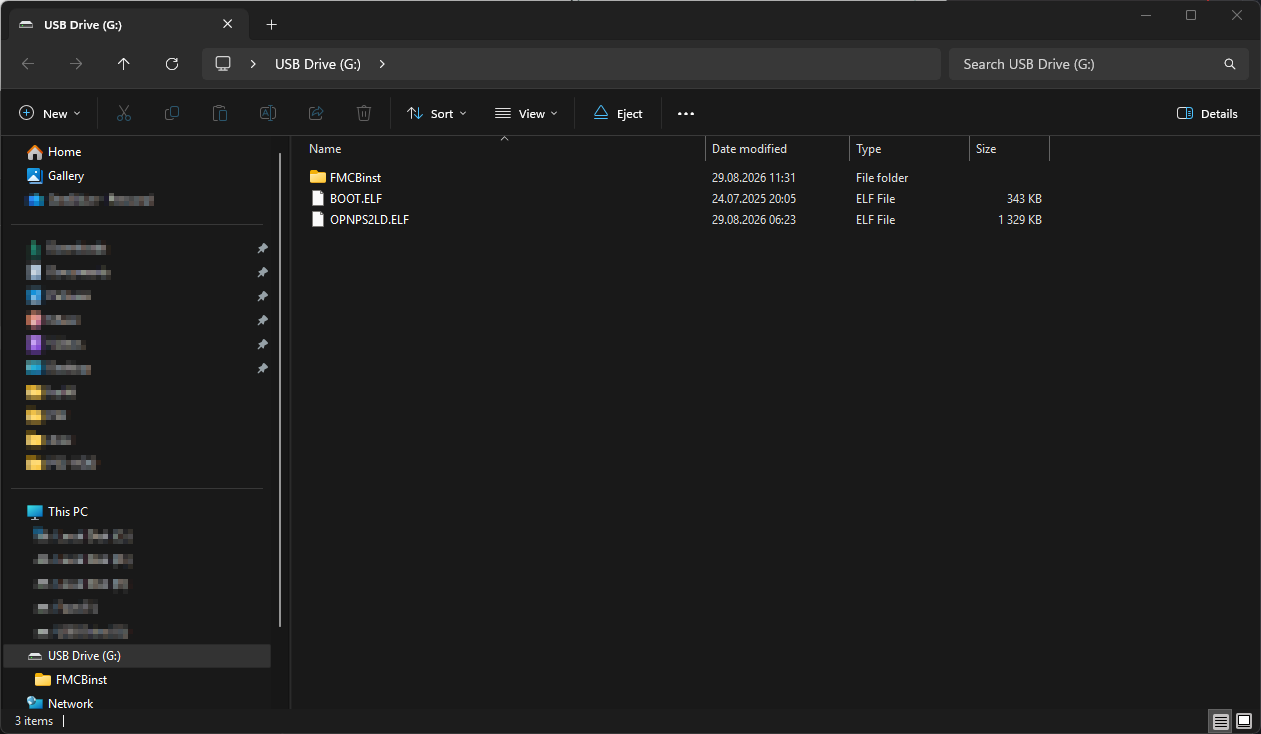
The USB drive is ready to be used
Install FreeHDBoot
Connect the HDD/SSD and the USB thumb drive to your PS2, and power it on. This will launch your PS2 straight into wLaunchELF. Navigate to the FMCBInstaller.elf (using Circle to select and Triangle to go back) and launch it.
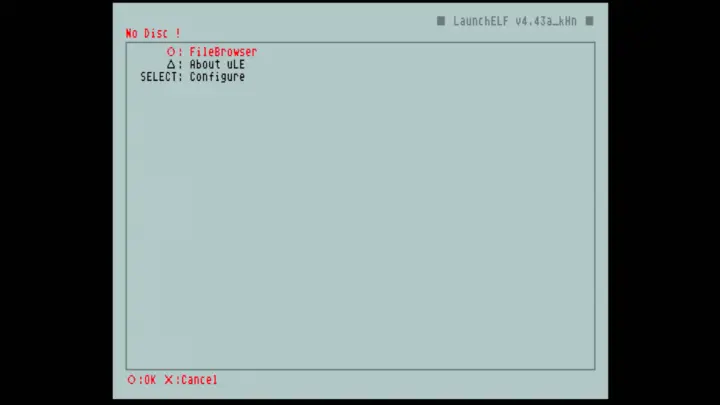
Open the file browser
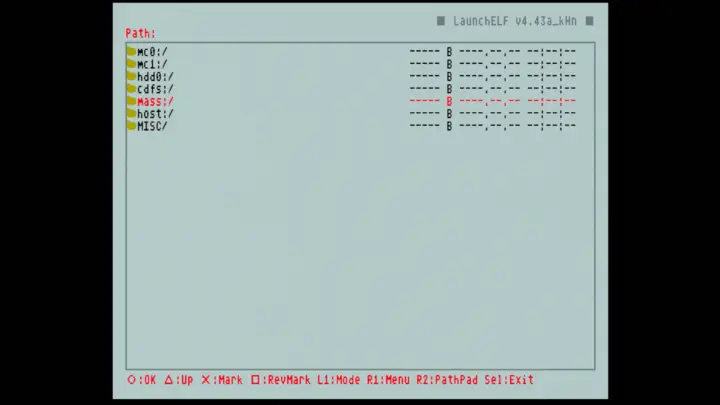
Select mass storage (the USB drive)
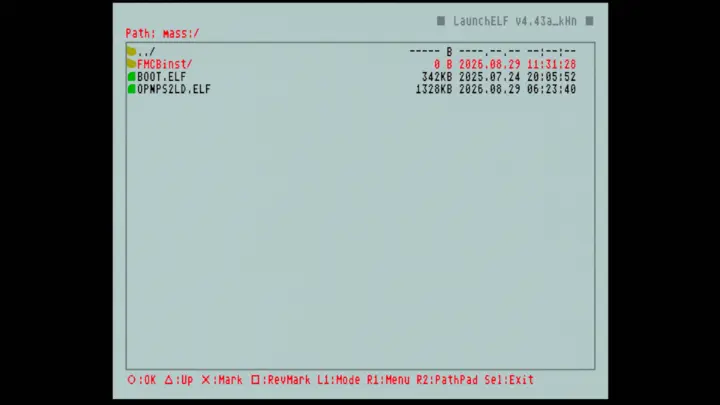
Open the FMCB installer dir
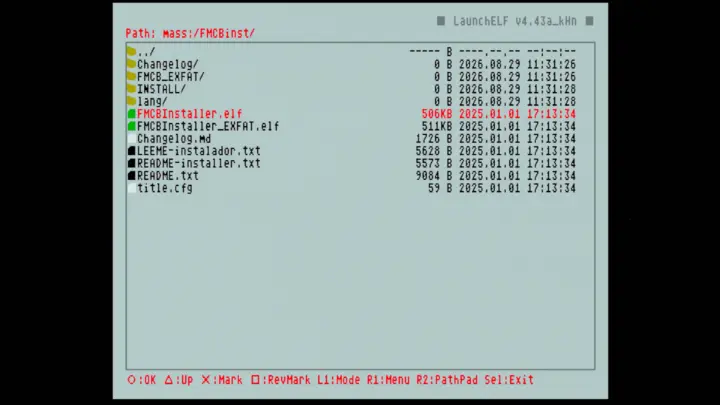
Launch the installer
The installation will start by properly formatting the HDD/SSD.
- Navigate to the extras menu by clicking R1
- Select Format HDD, and confirm by selecting OK.
The screen will freeze while the drive formats. On my HDD, it took about 2 minutes. Once it's done you will return to the extras meny where you can continue with the setup.
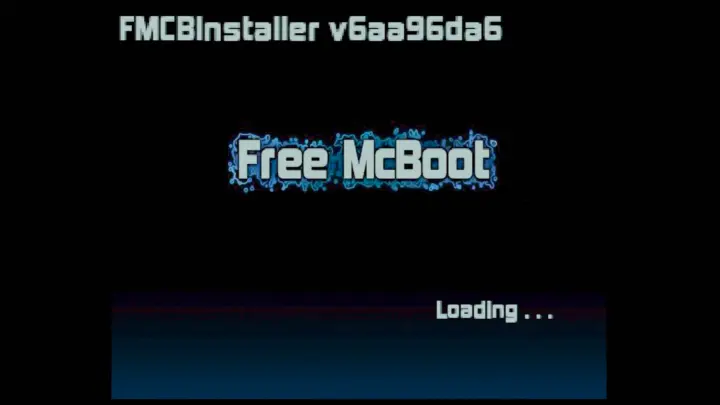
Free McBoot installer loading
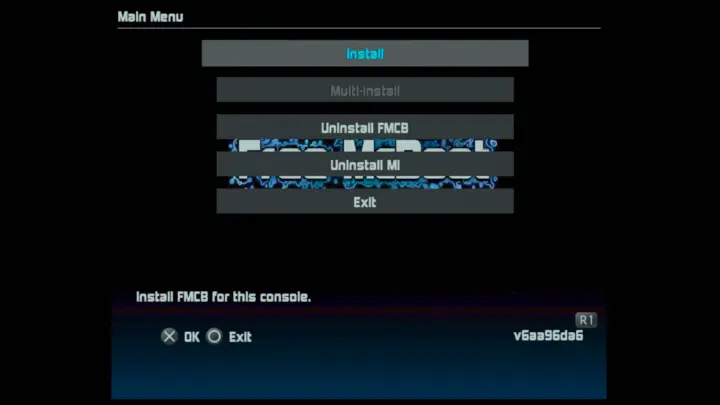
Press R1 to navigate to the extras menu
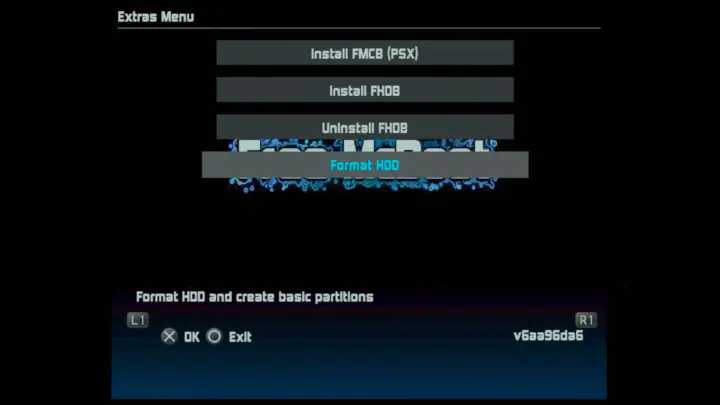
Select Format HDD
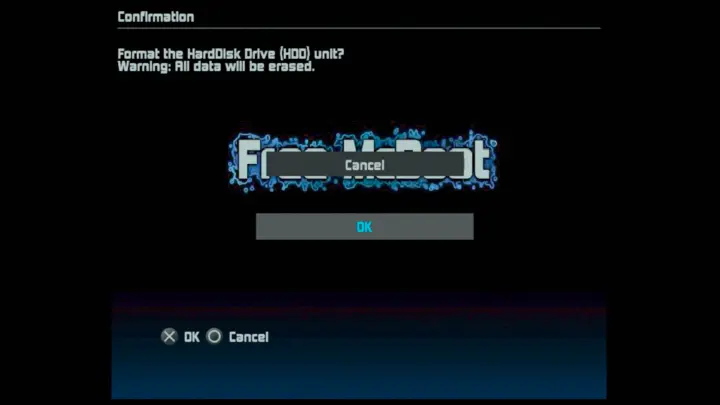
Press ok, to confirm. Be patient; this might take a few minutes.
Now, when the HDD/SSD is formatted, you can install FreeHDBoot. This will create most of the needed partitions, and copy the files needed to run FreeHDBoot. The last partition will be installed during the OPL configuration step of this guide.
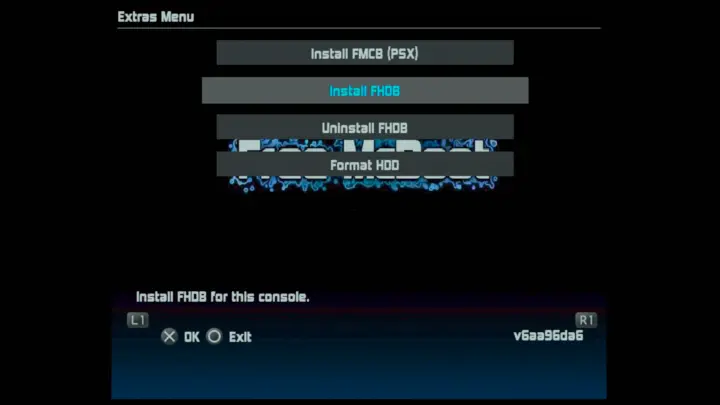
Select install FHDB from the menu
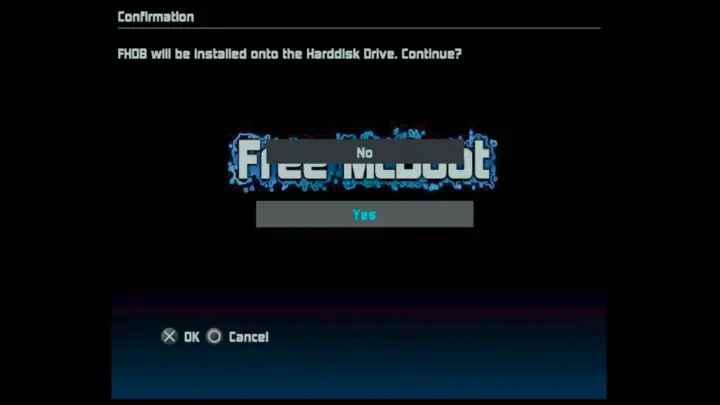
Click Yes, to start the installation
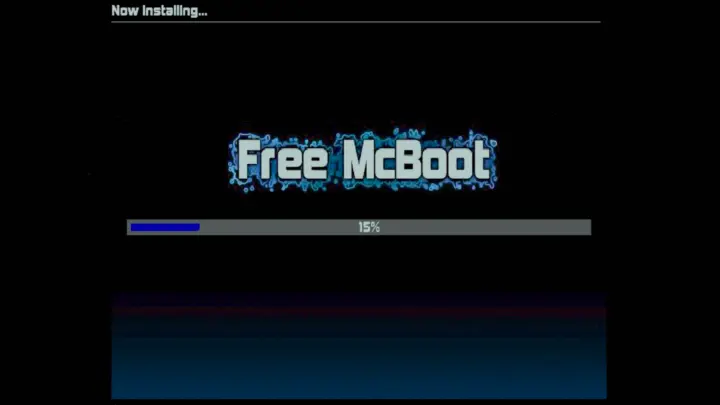
Wait for FreeHDBoot to complete installation.
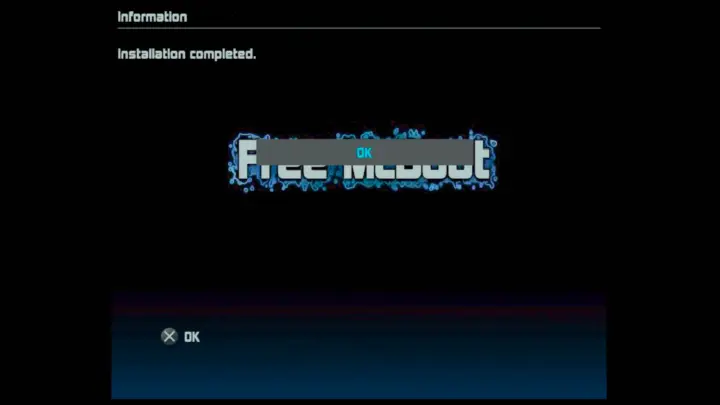
Installation completed
Now that FreeHDBoot is installed, you can press the circle button on your controller to quit the program. This will reboot your PS2, and launch FreeHDBoot.
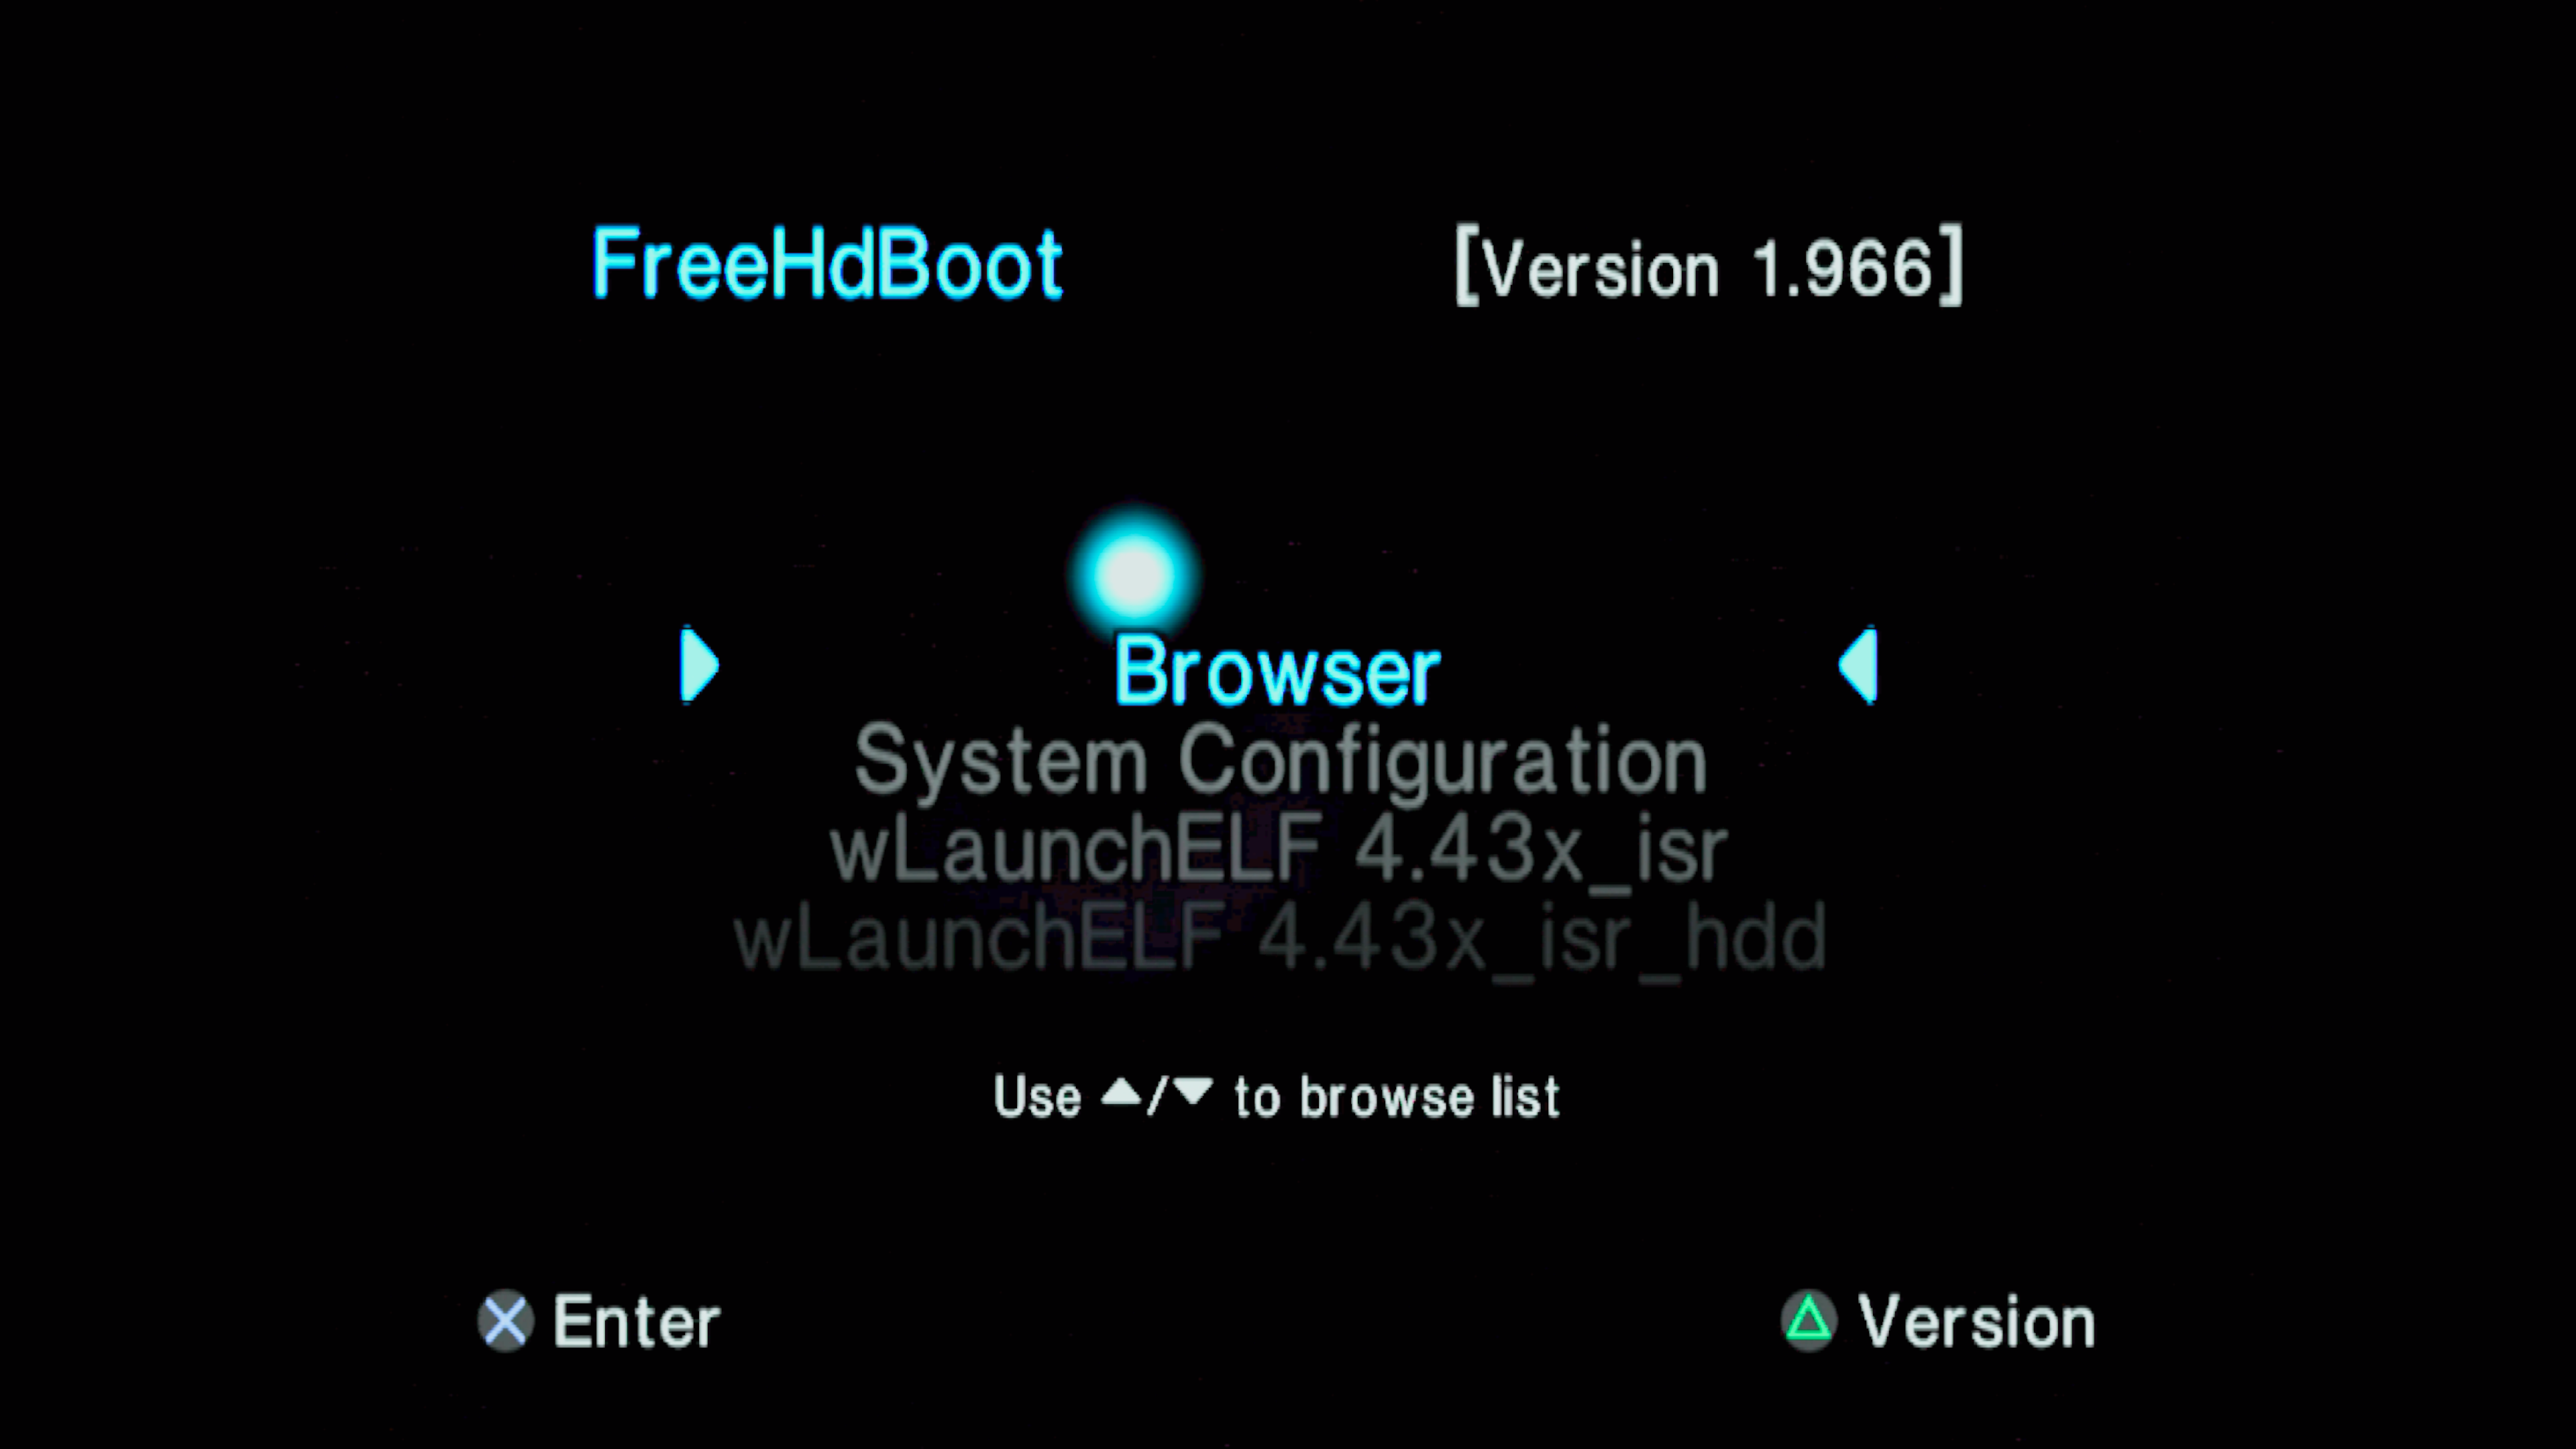
FreeHDBoot is successfully installed and running during startup.
Prepare OPL
The OPL version included in the FreeHDBoot installer is outdated, and to load game covers and other assets in OPL, you need to create a partition named +OPL. To fix both of these issues, we will use wLaunchELF by selecting wLaunchELF 4.32x_isr from the menu.
Update OPL by navigating to the mass storage device (using Circle to select, and Triangle to go back), and when OPNPS2LD.ELF is selected, press R1 to open the menu, and select "Copy" from the list.
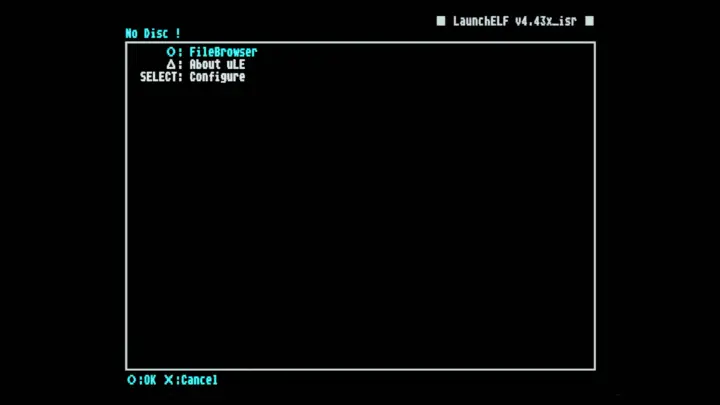
Open the File Browser in wLaunchELF
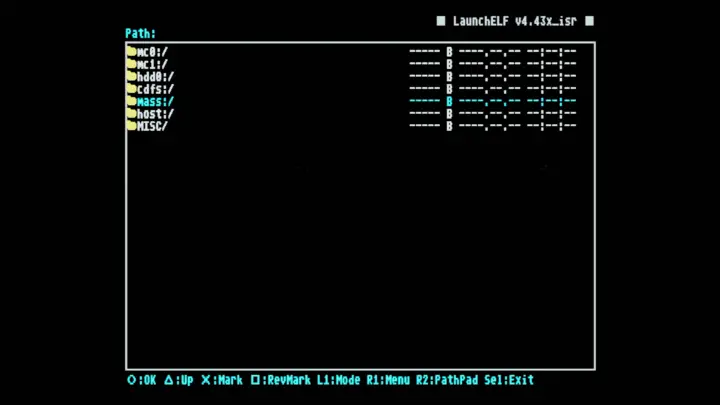
Select mass, to open the USB drive
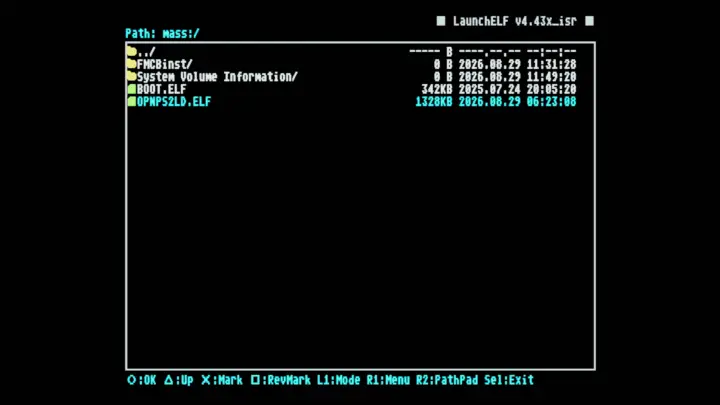
Select the OPL executable
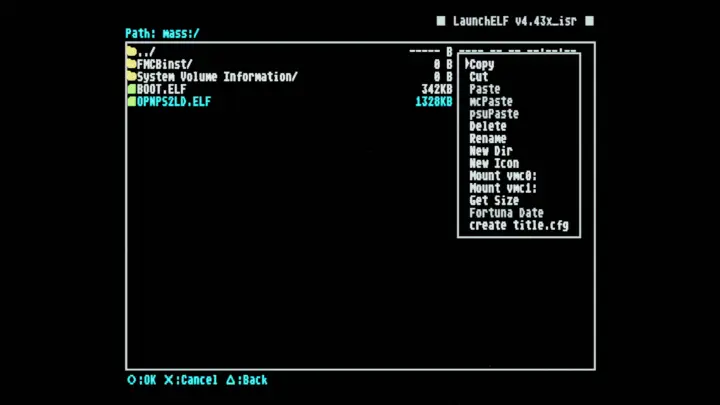
Press R1 and select copy from the menu
Then navigate to the HDD, go into the OPL directory, and paste it on top of the old executable.
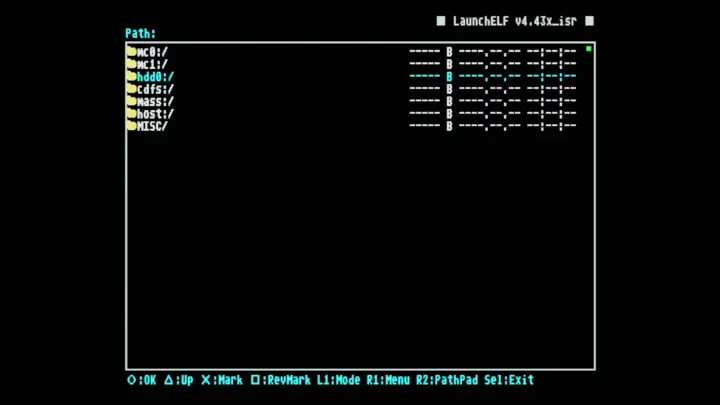
Go back to the root of the file browser, and select hdd0, to open the HDD/SSD
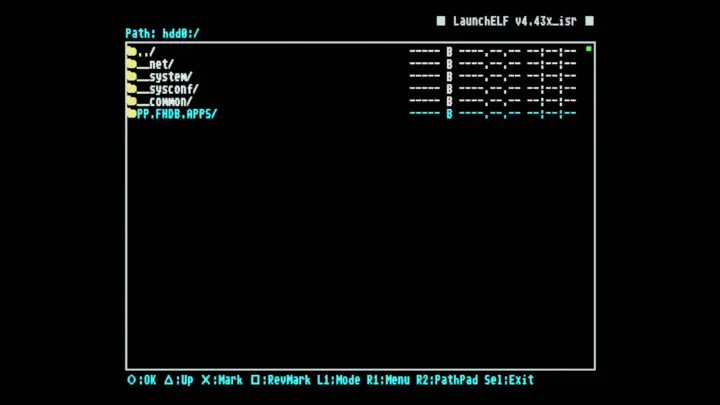
Open the FHDB apps directory
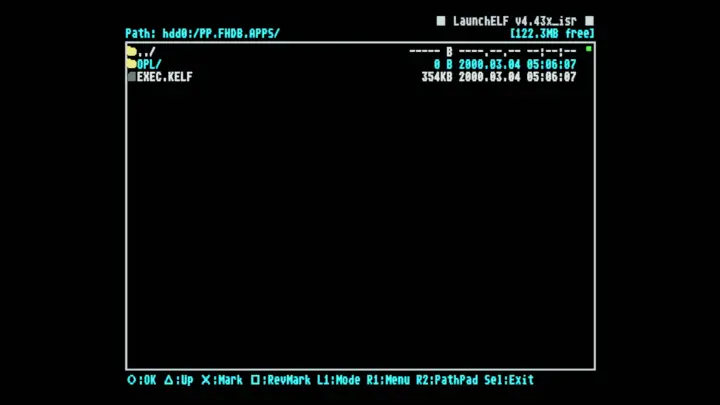
Open the OPL directory
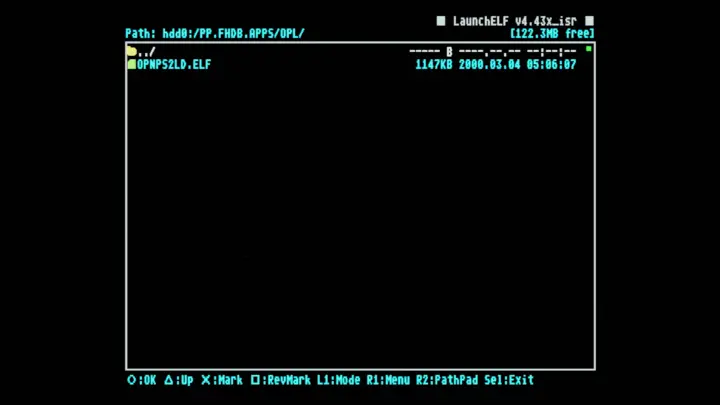
Press R1 to open the menu
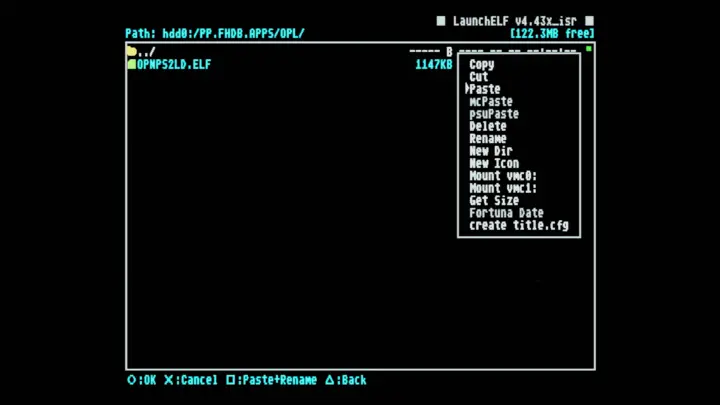
Select paste to overwrite the existing file
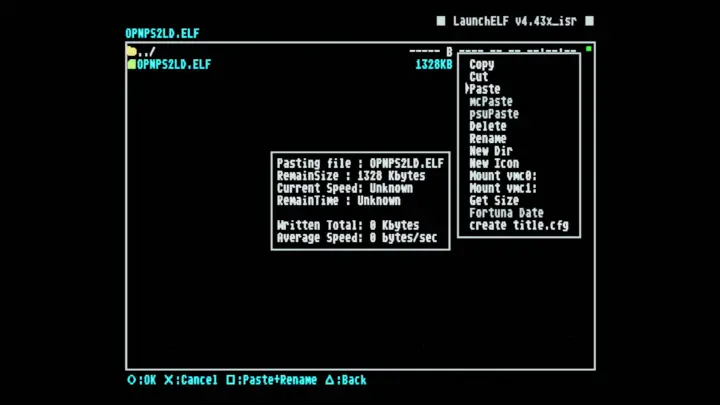
File getting pasted
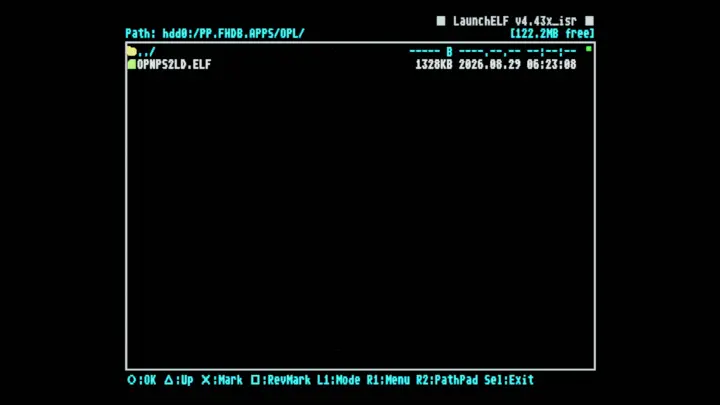
OPL successfully upgraded
Add the +OPL partition by going back to the root of the file explorer, opening MISC, and selecting the HDD Manager. This opens a partition manager that lets you create the partition. Press R1 to open the menu, select Create, give it the name "+OPL", and set the size to 1536 MB.
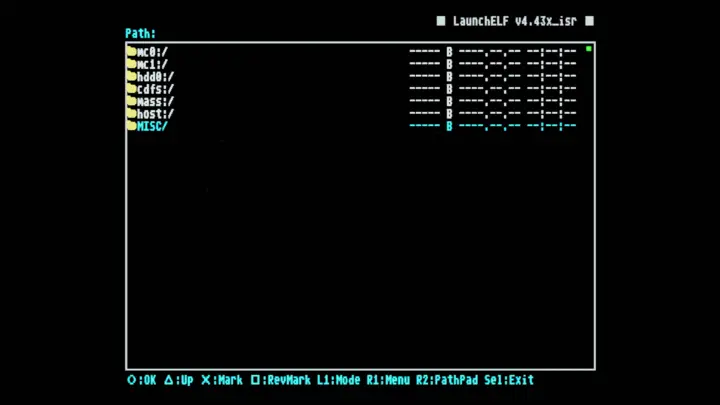
Open the misc, tools directory in File manager root
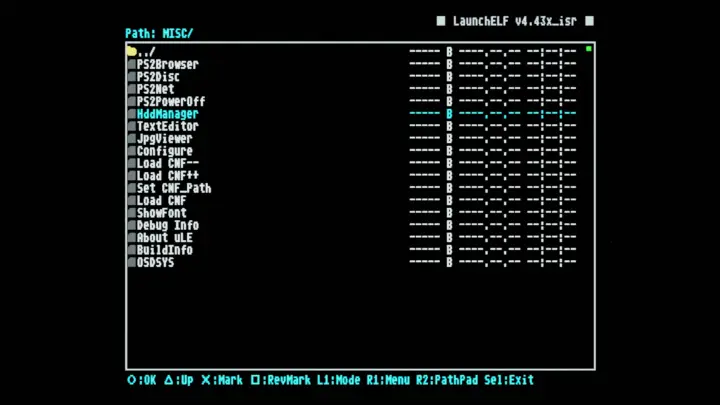
Launch HDD manager
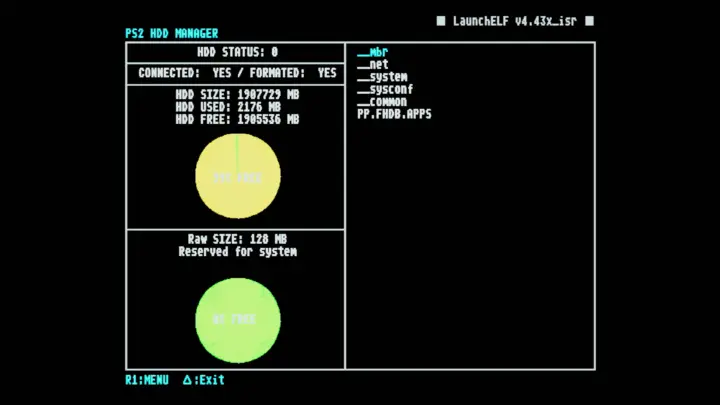
No +OPL partition has been created yet.
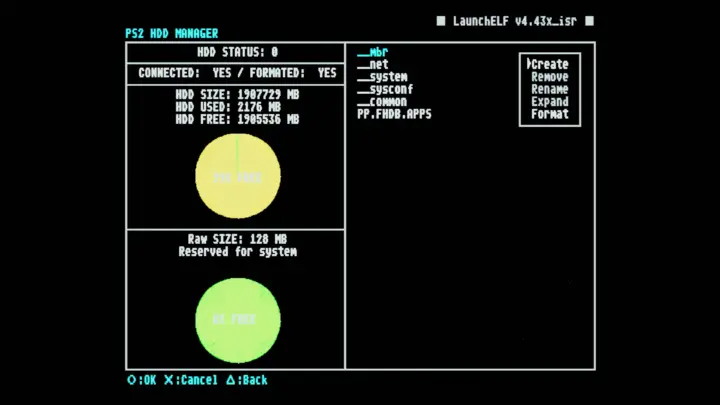
Press R1 to open the menu and select create
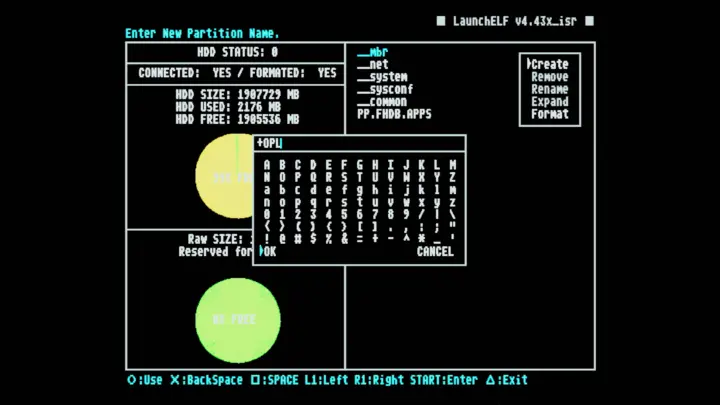
Name the new partition "+OPL"
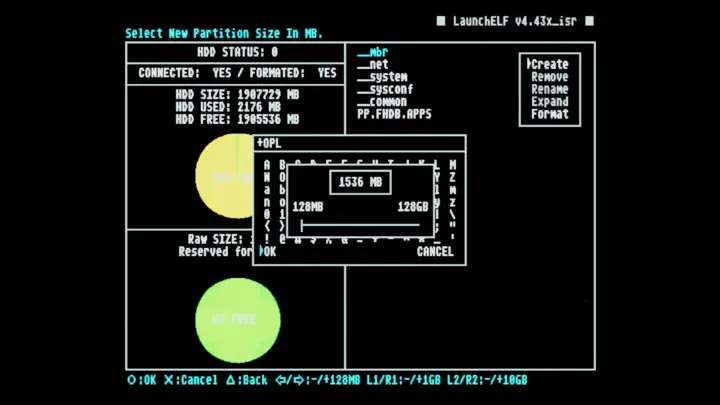
Set the partition size to 1536 MB
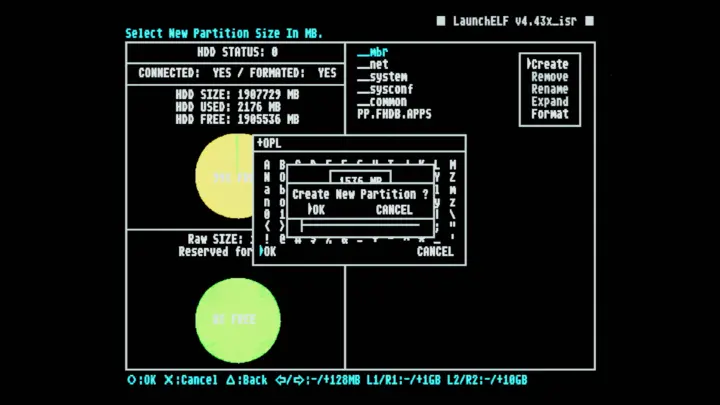
Click OK to create it
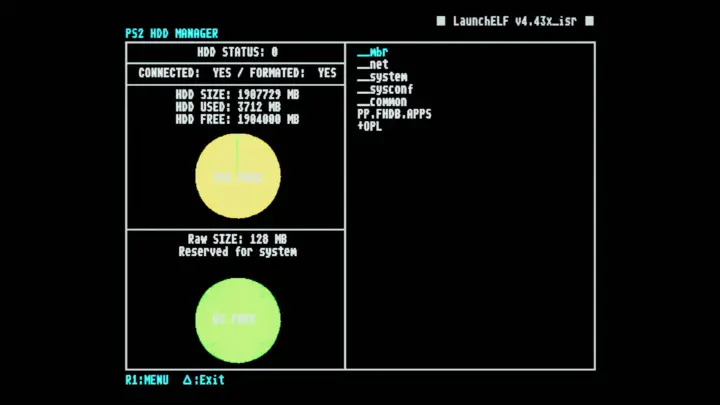
The +OPL partition successfully created
Now that OPL has been updated and the assets partition for OPL has been added, you can exit the HDD Manager and restart your PS2.
Add games
Adding your game libarary to the PS2 HDD/SSD
To transfer games to the PS2, use the HDL Batch Installer. You can download the latest release from the project's GitHub page. Download and extract the 7z archive. Run the .exe file, accept the warning about unsigned software, and run it with administrative privileges.
Start by searching for PS2 HDD's. It should find your HDD.
If you click on the Browse tab, you can see a list of your installed games, by clicking on the "Get list" button.
To install the games, open on the Install tab, click on the "Search Games" button, and select the ISO files of the games you want to install on the PS2 HDD/SSD. Then click on the "Install" button to start the installation. The progress can be seen in the PowerShell window that opens along with the GUI. Once installed, the game is listed on the Browse tab.
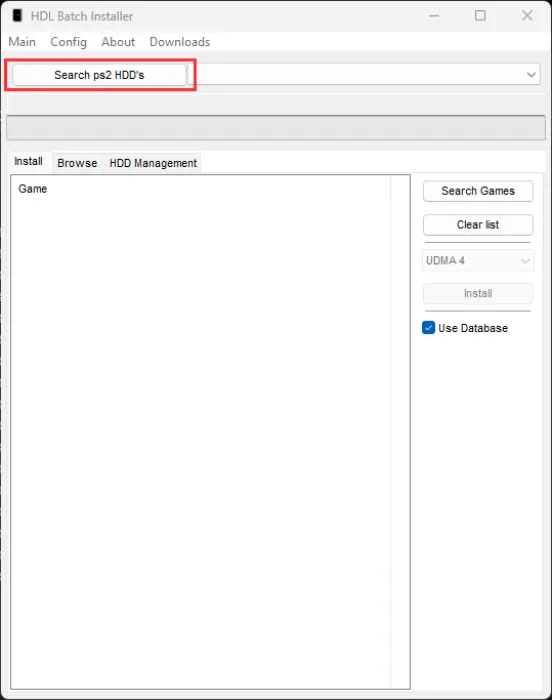
Search for PS2 HDD/SSD
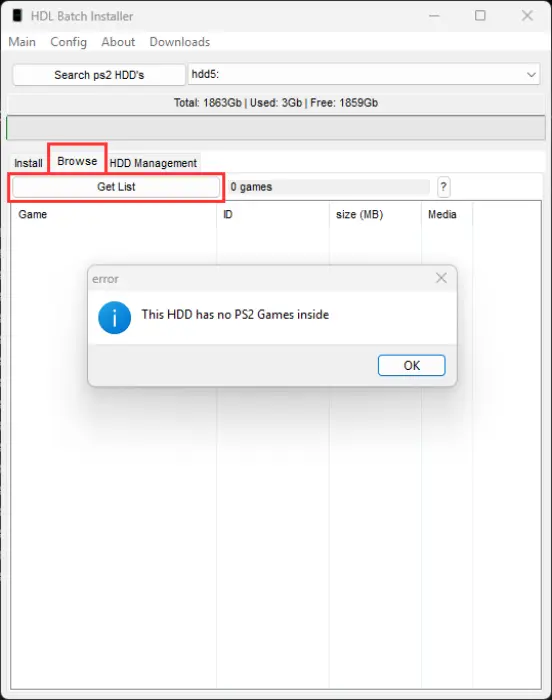
Currently no games are added
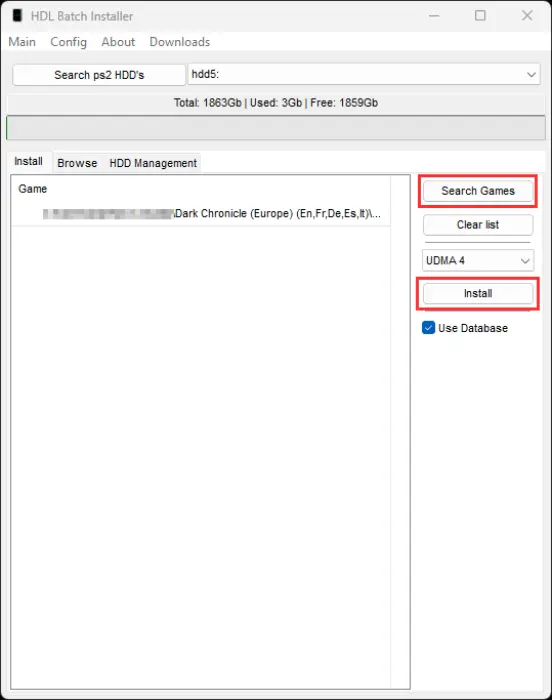
Add games to the queue, and install them
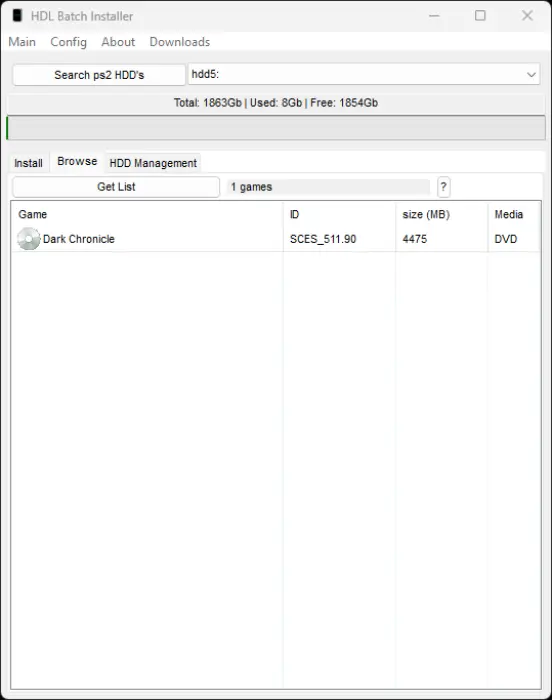
A game has been successfully added
Now that the game is added to the HDD/SSD, you can close the HDL Batch installer.
Adding cover art
OPL displays cover art of your game backups. The best way I have found to add cover art is to use OPL Manager to download cover art for the installed games on your HDD/SSD, then transfer them using the HDL Batch installer to mount the +OPL partition, and transfer the files using Windows Explorer.
You can download OPL Manager from its homepage. Extract the ZIP archive, open the exe file with admin privileges, and accept the warning about unsigned software.
From the top of the window, open "Local HDD Options" and select "Get game list". This will fetch all games you have installed on the HDD/SSD.
Next, select "Batch Actions" from the top of the window, and select "ART Download". This will open a new window. Make sure that all download options are selected, and press the "Start" button. The art assets will then download to a local directory on your PC, not the PS2 HDD/SSD. Close OPL Manager to continue.
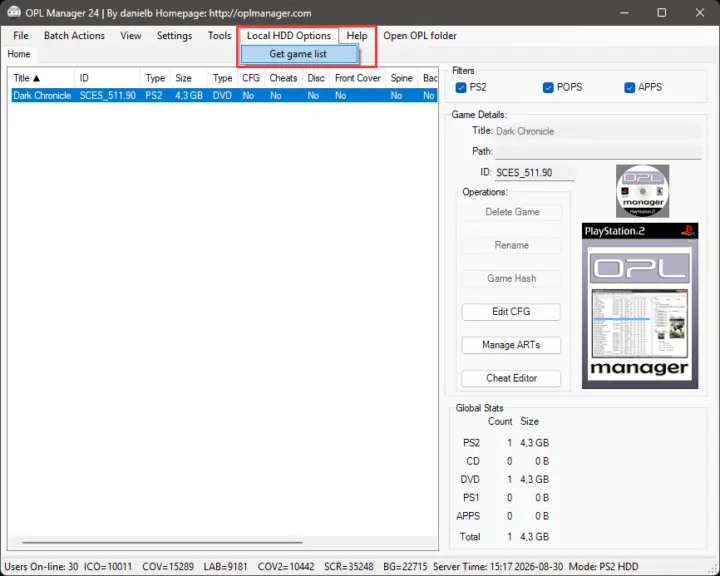
Get the game list from the HDD/SSD
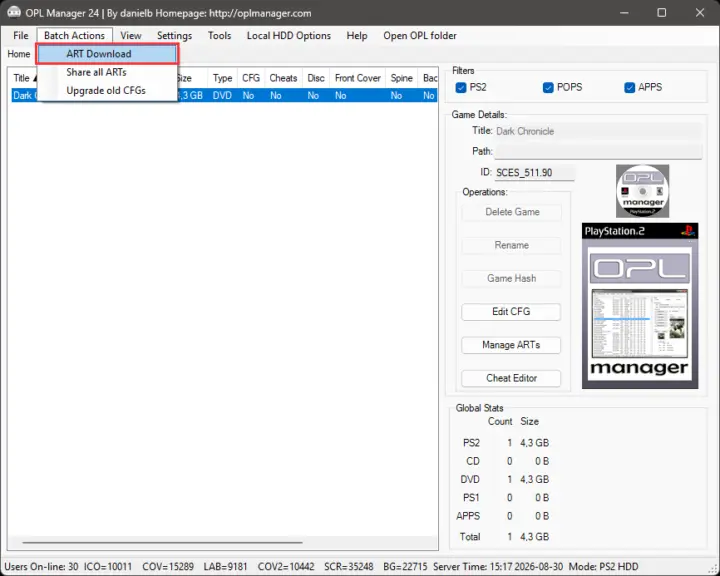
Open the cover art download window
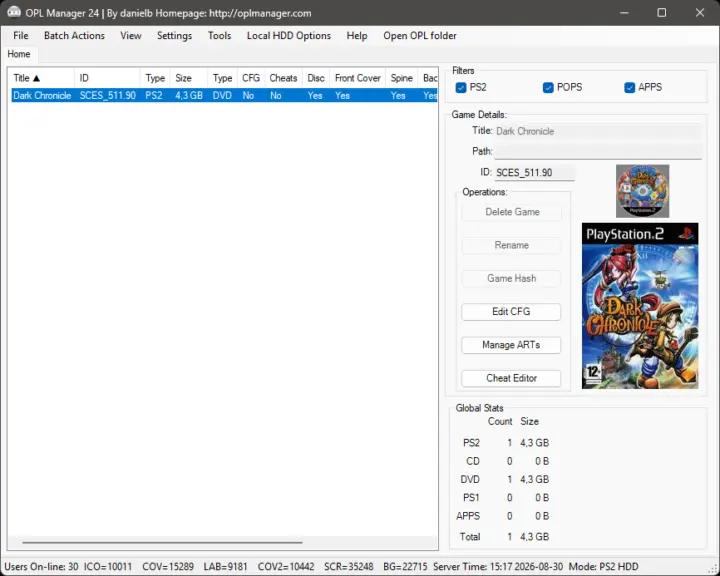
Cover art successfully downloaded to your computer
Now we can transfer the cover art to the +OPL partition of the PS2 HDD/SSD. Reopen the HDL Batch installer, search for PS2 HDD's, select the "HDD Management" tab, and click the "Mount HDD Partition" button. This opens a new window where you select the +OPL partition and the mount point you want to use on your computer. In this example, I selected the P drive.

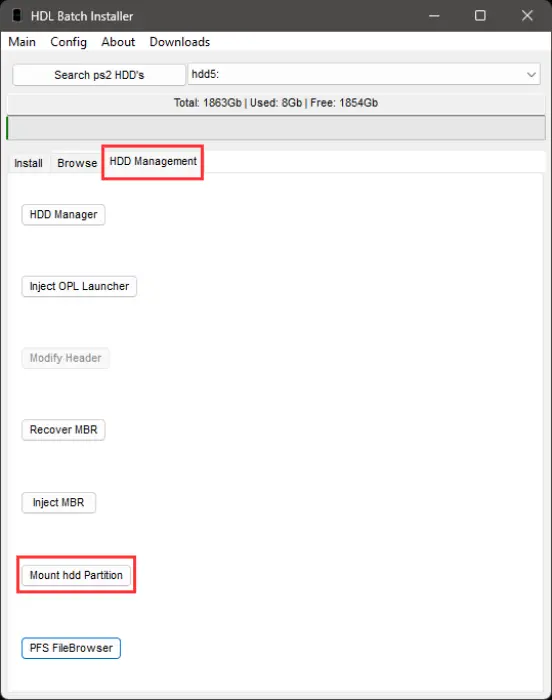
Open the mount partition window
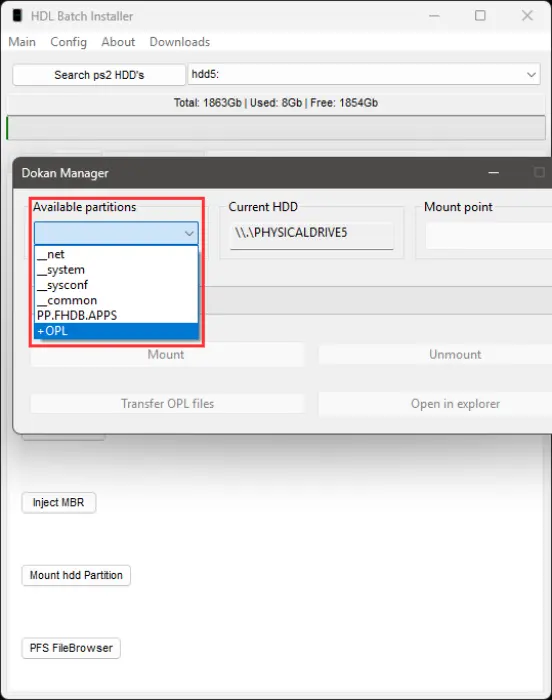
Select the +OPL partition
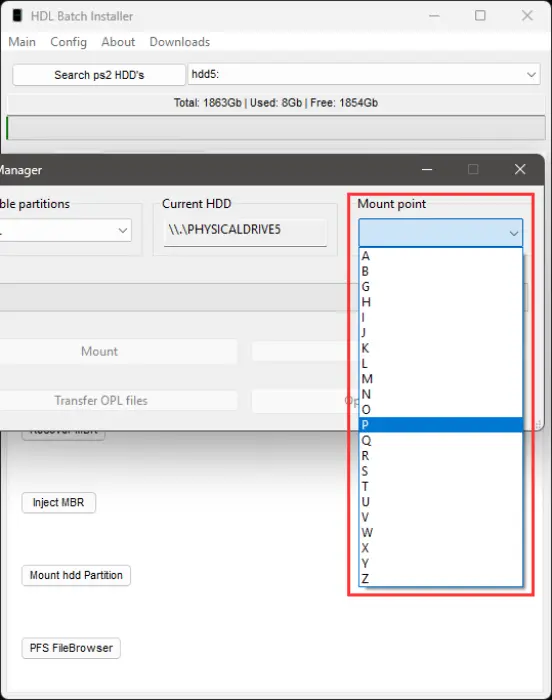
Select the drive letter the mount should be assigned
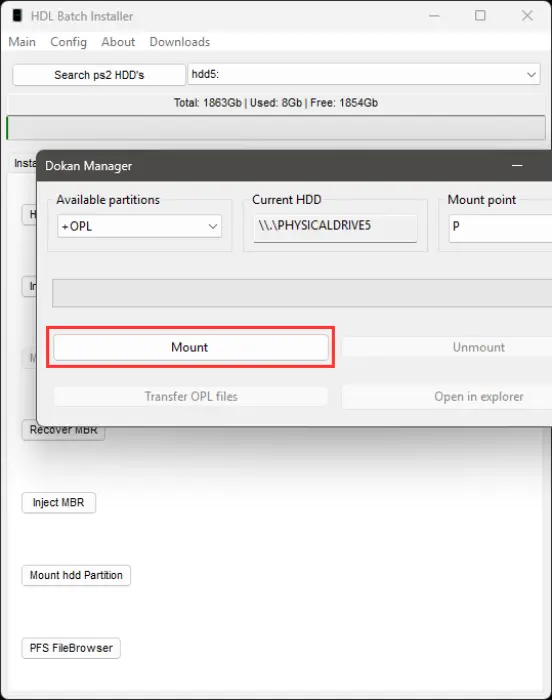
Perform the mount
Then go back to the directory with OPL Manager, open the "hdl_hdd" and ART directories, and select all files in the ART directory. Then open the partition, create a directory called ART, and paste the cover art files into it.
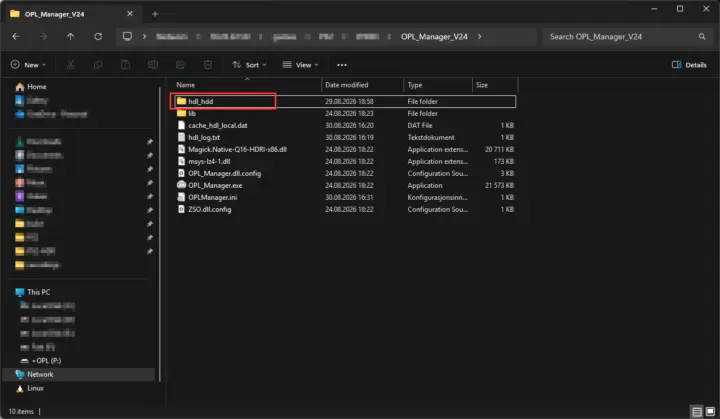
Open the hdl_hdd directory in the OPL manager directory
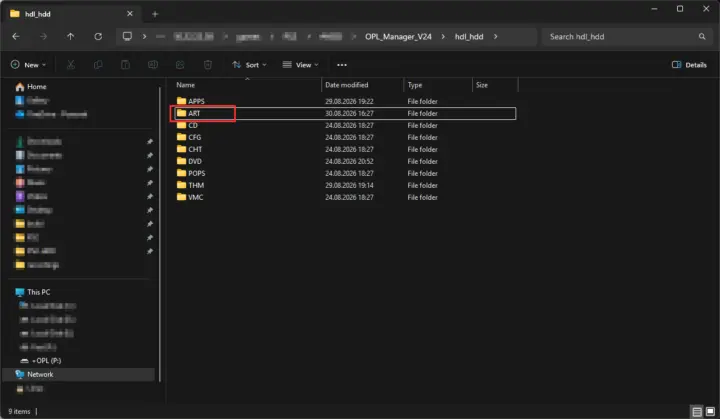
Open the ART directory
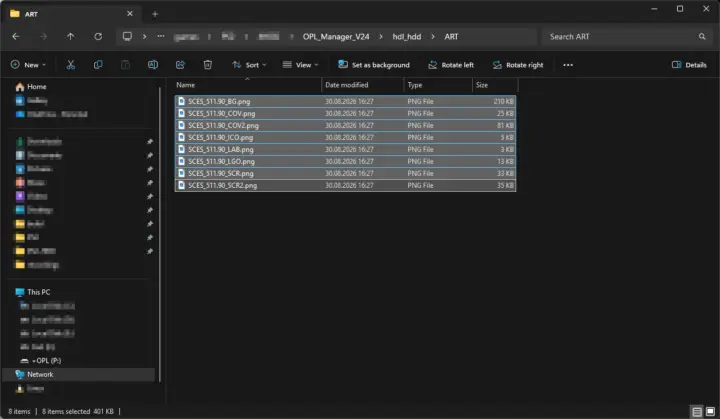
Select all files and copy them
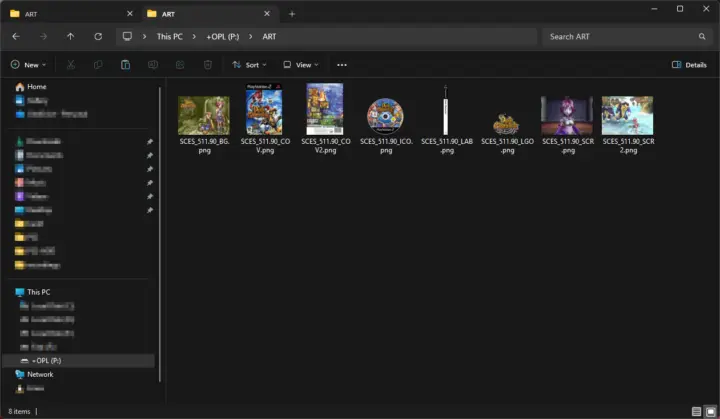
Paste the files in the ART directory on the mounted +OPL partition
Close File Explorer, unmount the +OPL partition, close the HDL Batch installer, and disconnect the PS2 HDD/SSD from your computer.
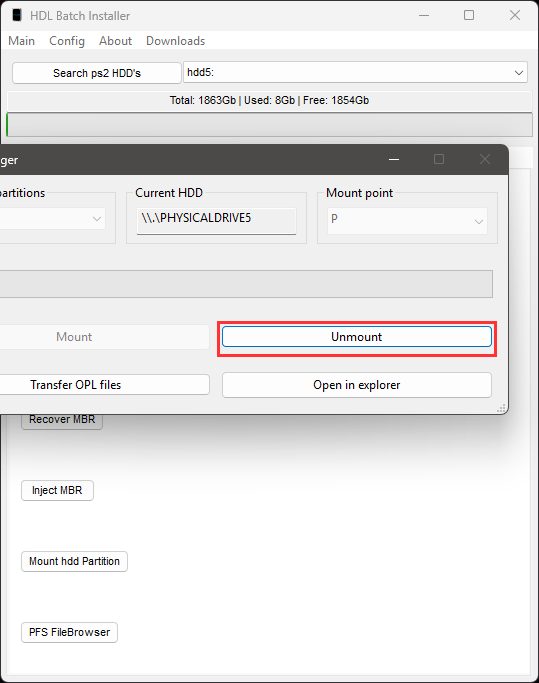
Unmount the +OPL partition
Configure OPL
When you have connected the HDD/SSD to your PS2, you can power it on, launch OPL, and start configuring OPL.
Select "Settings" from the top of the menu and change the following settings:
- PS2 Logo: On
- Cache Game list (HDD): On
- Write operations: On
- Remember Last Played Game: On, Autostart 0
- BDM Start Mode: Auto
- HDD (APA) Start Mode: Auto
- Default Menu: HDD Games
Then click OK to go back to the previous menu.
Then select "Display Settings", and change the following settings:
- Automatic Refresh: On
- Cover Art: On
- Notifications: On
- Video Mode: EDTV 640x448p @60Hz 24bit
Then click OK, and accept the changes, and go back to the previous menu. If you want a better contrast for the highlighted lines in menus, i reccomend darkening the "Selected color"
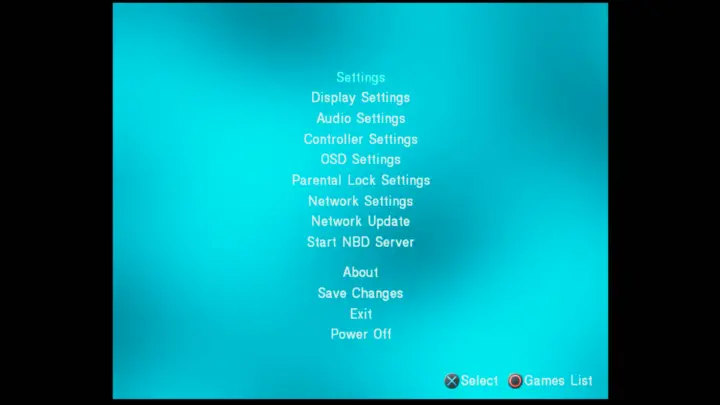
Open the settings menu
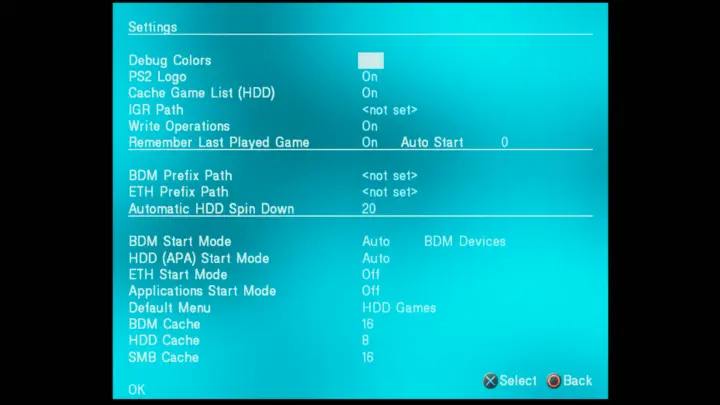
Set the basic settings
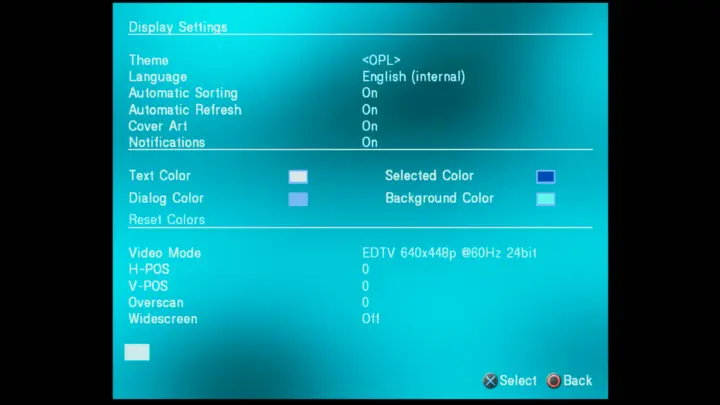
Set the display settings
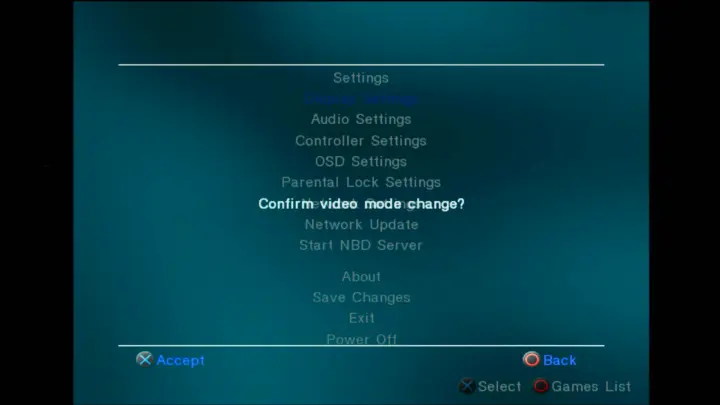
Confirm changes
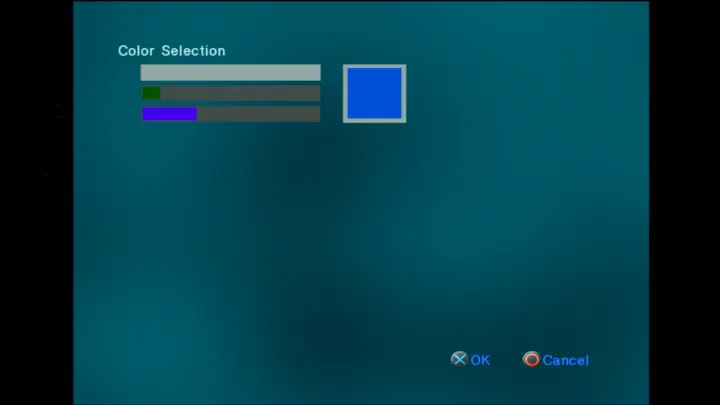
Set a higher contrast color for the selected text in OPL
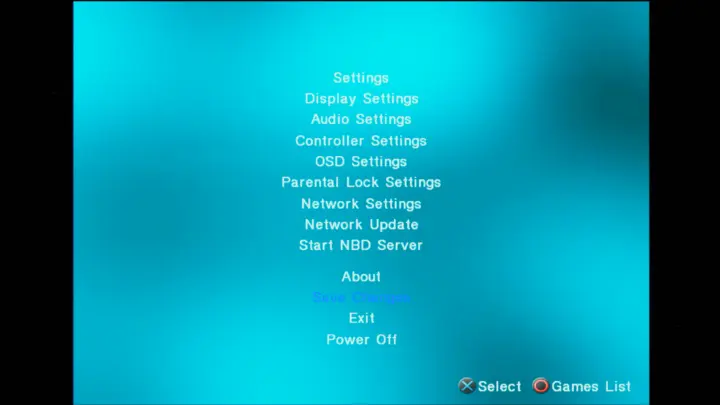
Remember to save your changes
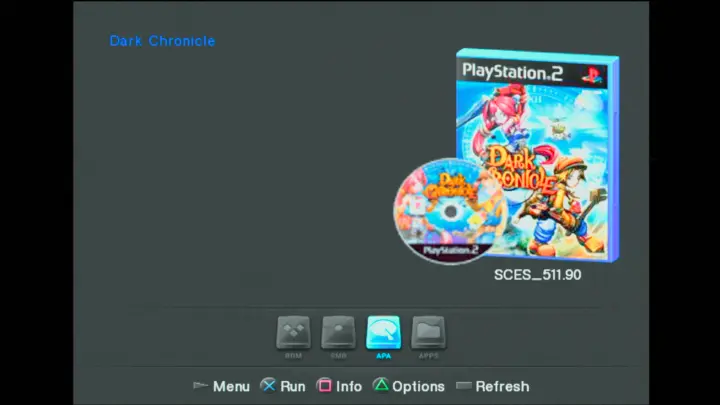
Game list with cover art successfully loaded
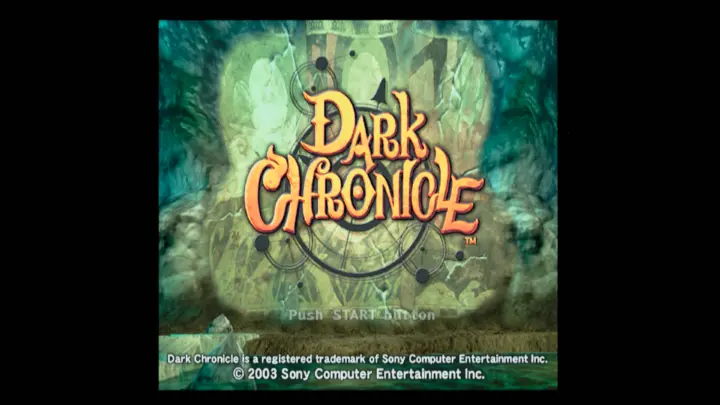
A successfully launched through OPL
That's it! You now have all the tools you need to run your game backups from an HDD/SSD without a modchip or a FreeMCBoot memory card. 🎉