In my house, Linux is everywhere. Even in my hallway! I use an old Raspberry Pi 3 as an info screen that shows basic information, like a clock, a simple calendar, and a weather forecast for the next 12 hours.
In this article, I will provide an easy-to-follow guide on how you can achieve a similar project of your own.
SSH and VNC
Remote management
After downloading the latest version of Rasberry Pi OS from the Raspberry Pi homepage, flashing it to a micro-SD card, and completing the installation process you are ready to customize the Raspberry Pi OS config in order to make it function as an info-screen.
Instead of having to connect a keyboard and mouse to manage the info screen, It's nice to be able to remotely manage it. To do so, open the main menu, navigate to Preferences and click on Raspberry Pi Configuration (See image below).
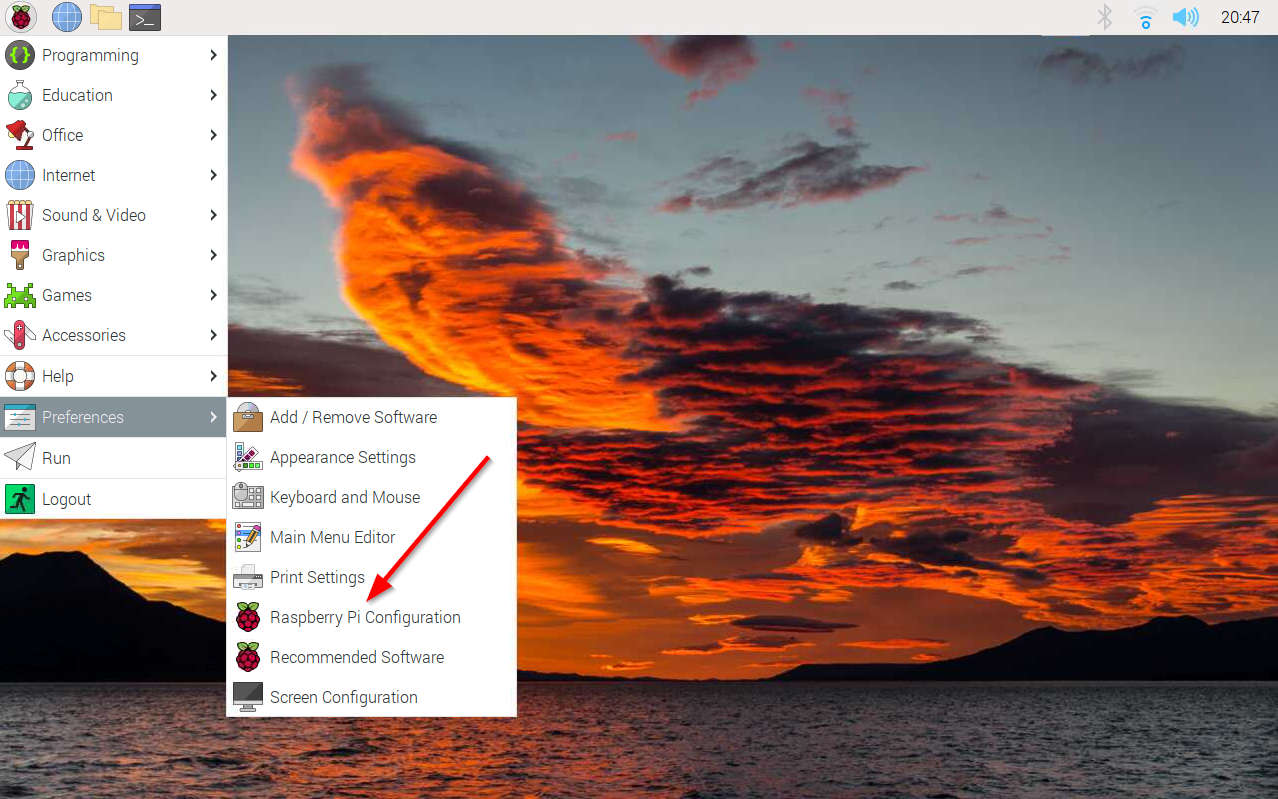
Open Raspberry Pi Configuration
I want to enable a VNC server and SSH server on the Raspberry Pi, select the Interfaces tab and turn on the light switches for VNC and SSH. (See image below)
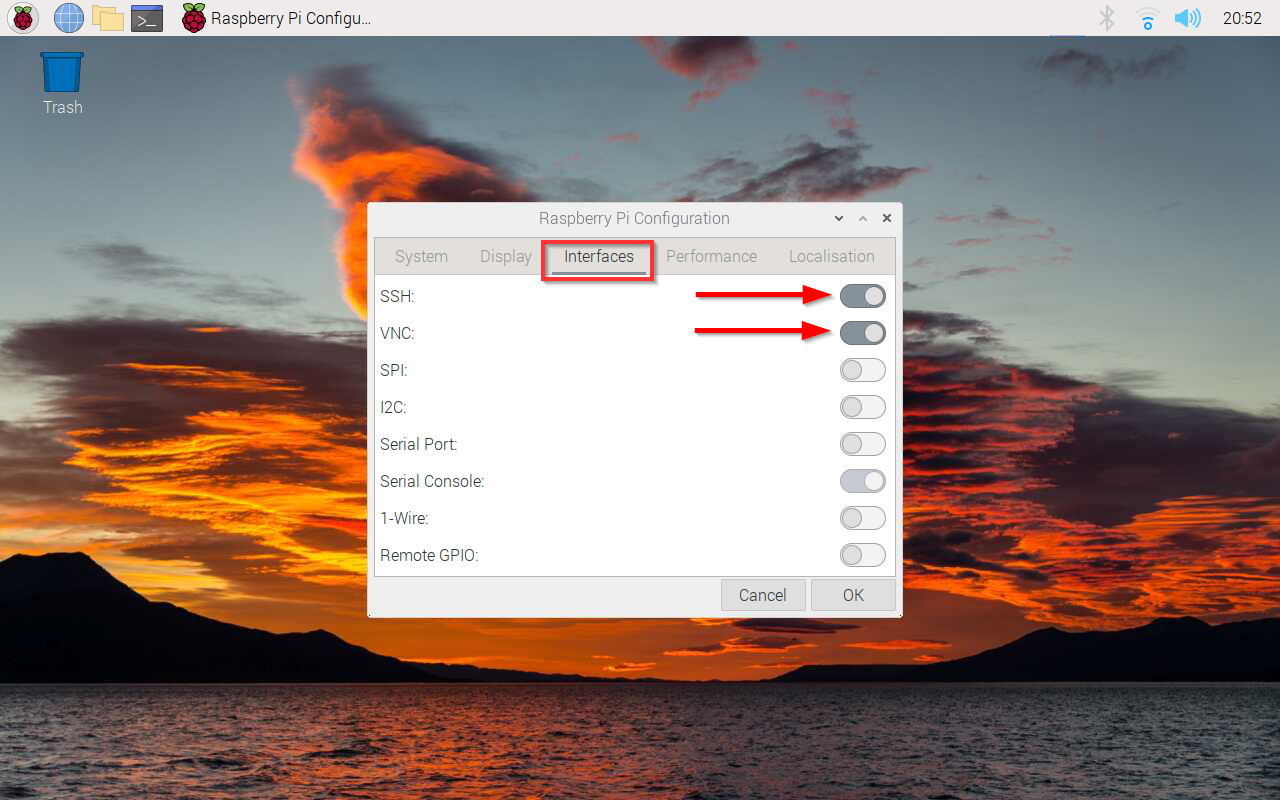
Enable the VNC server and the SSH server.
This enables us to connect remotely and use the keyboard and mouse from another computer via VNC, and via a terminal emulator with SSH.
To connect to the info screen by VNC, the Real VNC client for Windows is a nice, easy and clean option. Simply download and install it, create and log in with your account and connect to the IP address of the Info screen.
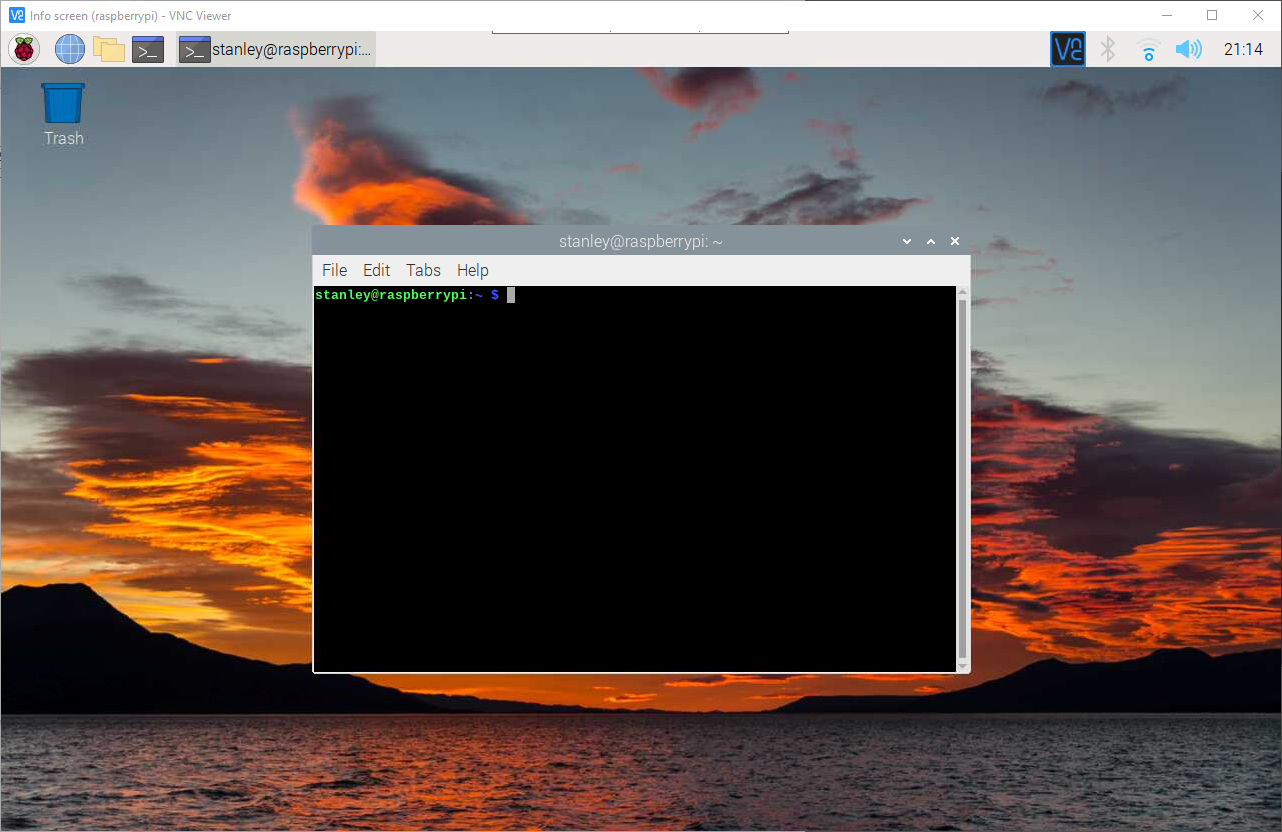
Remote connection to the info screen with VNC
To connect by SSH it's nice and easy to use PowerShell to connect to the info screen. Run this command to connect.
ssh stanley@10.22.22.198Static IP
Like every other IoT device and server running in my home, I wanted the info screen to have a static IP. When a device has a static IP address I know how to connect to the device, and in addition, I can give it a human-friendly hostname that is resolved by my own home DNS server.
To quickly give the info screen a static IP add a few lines to the end of this file:
sudo vim /etc/dhcpcd.conf...
# Info screen - static IP configuration:
interface wlan0
static ip_address=10.22.22.52/24
static routers=10.22.22.1
static domain_name_servers=10.22.22.1 8.8.8.8This will set a static IP for the WLAN interface on the info screen. To set a static IP for the wired ethernet change the interface name to "eth0".
The /24 at the end of the IP address is similar to writing a network mask of 255.255.255.0.
The router IP is the same as the default gateway in Windows.
To apply the changes, reboot the info screen.
sudo init 6Once the Info screen has rebooted, you can access it by its new static IP.
Rotate screen
In my hallway I wanted the screen to be in portrait orientation. This can easily be achieved by adding a line to this file:
sudo vim /boot/config.txt...
display_hdmi_rotate=3This will rotate the screen 270 degrees. To rotate it 90 degrees use the value 1, instead of 3.
Another method is to change the orientation by opening the Main menu and selecting the Screen Configuration. From there you can select the desired screen orientation by right-clicking on the screen and chose from the contextual menu.
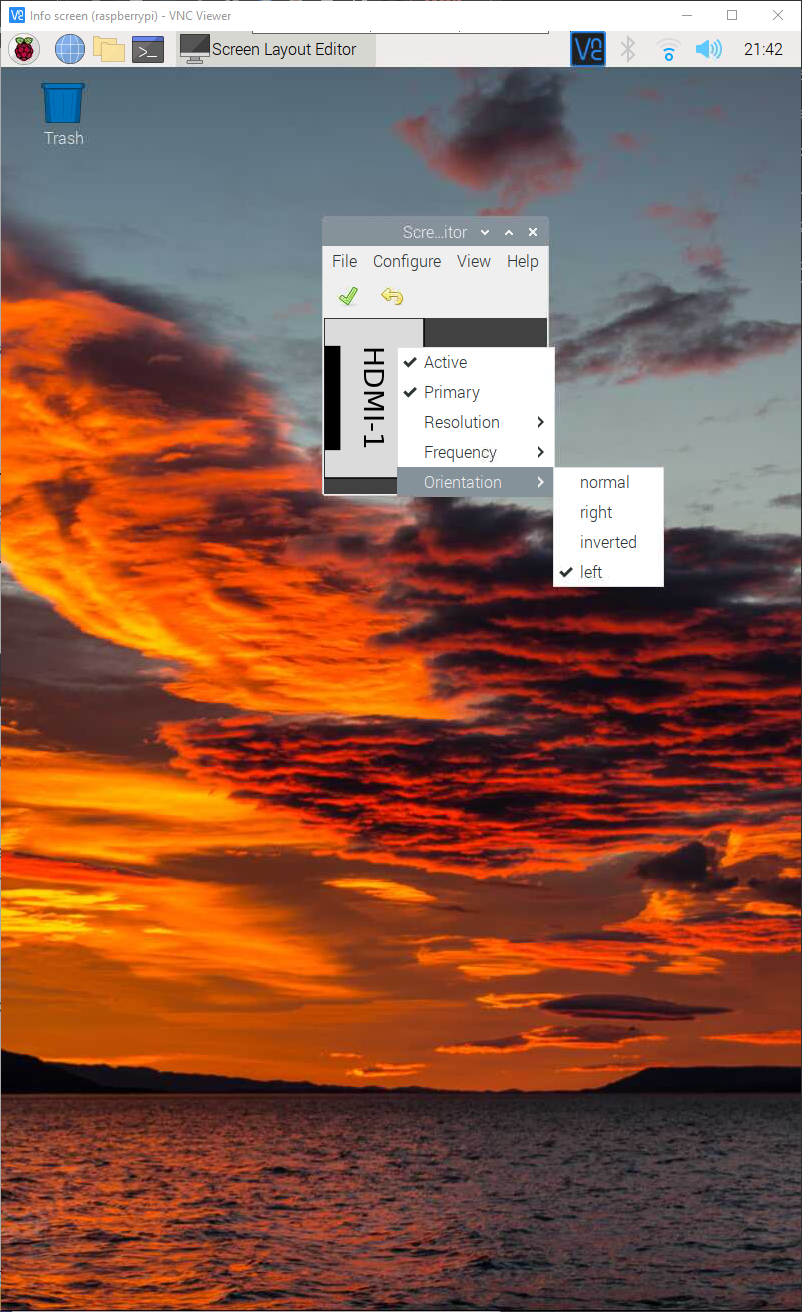
Select correct screen orientation
Stop power-warnings
For some strange reason, the Raspberry Pi will throttle down to a lower CPU speed and display a warning when using a regular 5V USB power supply. To stop this from happening, add a new line to the boot configuration file.
sudo vim /boot/config.txt...
# Avoid CPU throttling and stop power warning
avoid_warnings=2Reboot the system to apply changes.
Disable screensaver
Info screen should never turn off!
An info screen should always be on, showing the information we want to display. To prevent the screen from powering off add the following to this file:
sudo vim /boot/cmdline.txt... consoleblank=0Hostname
Giving the infoscreen a identity
To ensure that remote management via SSH is as easy as possible it's a nice touche to give the Raspberry Pi a unique hostname. I did choose to give it the name "infohallway" by running the following command:
sudo echo "infohallway" > /etc/hostname
sudo echo "127.0.0.1 infohallway" >> /etc/hosts
The next time a terminal emulator is opened on the info screen or an SSH session is started the hostname will show "infohallway" instead of "raspberrypi".
Web server
Nginx setup
This info screen will host its own webserver to provide the website that will make up everything that is visible on the info screen. to install nginx run this command:
sudo apt install nginx -yTo add a custom website to be hosted change the ownership of the default Nginx directory to yourself, remove the default Nginx HTML file, and add your own project files to the directory.
sudo chown -R stanley:stanley /var/www/html
rm /var/www/html/index.nginx-debian.html
## add your own project files ##
Autostart kiosk
Autostart chromium in kiosk mode
To automate the process of starting chromium in kiosk mode with our info screen webpage we need to create a shell script that can be run during startup. For convenience, I decided to place it in the default Nginx webserver directory alongside the project files.
vim /var/www/html/kioskstart.sh#!/bin/bash
chromium-browser --kiosk --incognito --disable-pinch --overscroll-history-navigation=0 http://infohallwayThen, make it executable for all users:
chmod +x /var/www/html/kioskstart.shTo run the script when the info screen boots, add it to the startup file:
sudo vim /etc/xdg/lxsession/LXDE-pi/autostart...
/var/www/html/kioskstart.shReboot the info screen to verify that chrome did start in kiosk mode and that you have a fully functioning info screen.